eTime Guide
A guide to all things eTime
- Overview
- Navigating and Finding Shifts
- Recording Time
- Adding Events to a Shift
- Editing Start and End Times
- Creating and Submitting a Forgotten Shift
- Enabling Location Services
- Fixing Location Inaccuracies
- Location Services Help
- Reviewing A Shift
- Viewing Shift Comments
- Correcting a Shift
- Requesting/Submitting Time Off
- Deleting a Shift
- Auto-Deleted eTime Shifts
- Method Options
- Recording a Virtual Face to Face Shift
- Data Validation
- Special Cases
- Staff-Side Overlaps
- Circle-Side Overlaps
- Tips for Preventing and Solving Common Issues
- Shift Approval Reminder Emails
- Glossary of Terms
- Glossary of eTime Icons
Overview
What is eTime?
eTime is a web browser-based method for recording, approving, and submitting time to ISS for payment. It requires the cooperative involvement of a support staff and the participant’s circle of support: the support staff to enter their time and the circle of support review and approve the time, each thereby electronically authenticating the information.
Process
There are four (4) main steps in the eTime process: Recording Time, Reviewing Time, Correcting Time, and Payroll Processing.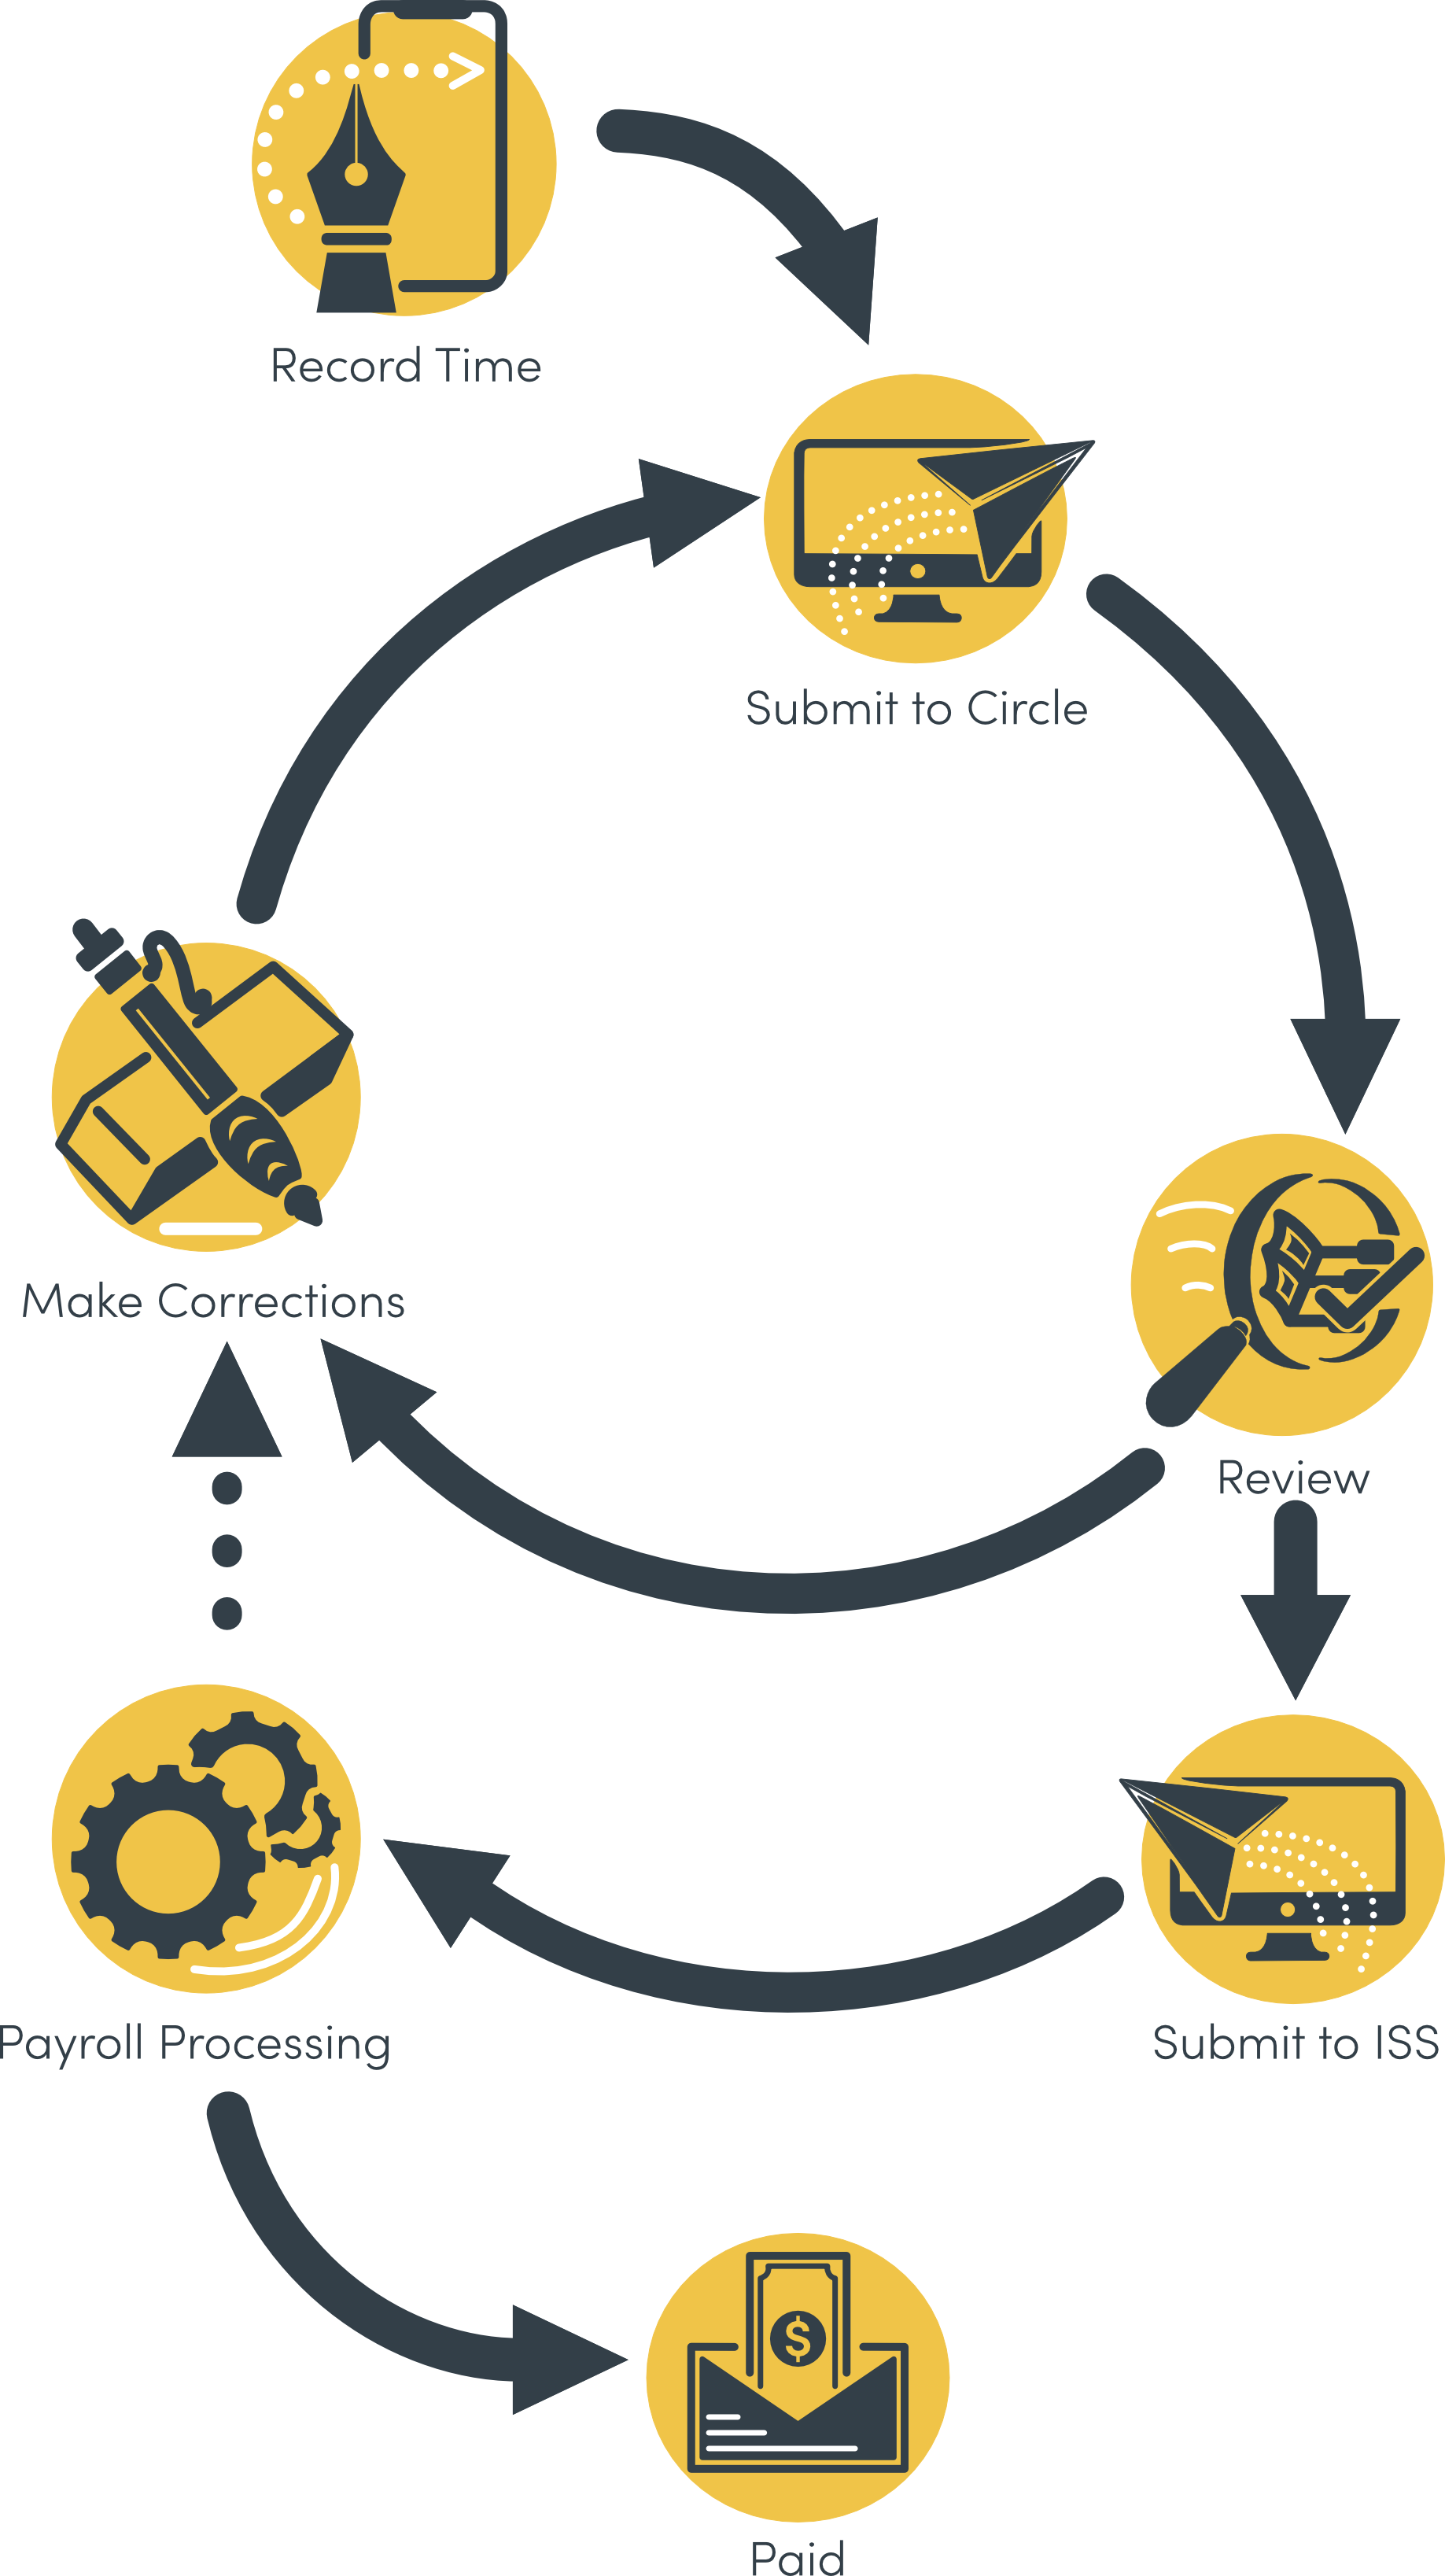
Recording Time
- There are two ways, or sources, with which to record time with eTime: Live and Entry. eTime Live allows you to clock in and out in real time as you work. eTime Entry allows you to record time manually after the fact.
- eTime Live is the preferred source for recording time with eTime.
- For eTime Entry, the support staff records his/her time as close to the time of service as possible.
- After time has been recorded, the support staff will submit it to the circle of support for review and approval.
As of midnight 12/6/2020 you must use eTime Live and punch in and out for each shift's start and end. eTime Entry will no longer be an option for dates 12/7 and beyond except for PTO. Learn more»
Reviewing Time
- Upon submitting the shift for review, each of the following who have a portal login will receive an email notification that there is time to review: participant, primary contact, and any other individual in the circle of support designated as a “web approver”. The previous three groups of individuals are the only ones able to review and approve time.
- The circle will then review each shift, either approving or rejecting each shift. If a shift is rejected, a reason and description must be provided. This reason and description will be displayed to the support staff to make corrections.
- If a shift is rejected, it will be returned to the support staff to make corrections.
If all shifts are approved, it will be marked as approved, and will be automatically submitted to ISS for processing within the next business day.
Correcting Time
- The support staff will receive an email notification if the shift is returned for corrections. They will also receive an email notification if the shift is approved.
- The support staff will log into the portal and select the shift to make corrections. After reviewing the circle comments and making the necessary corrections, they will resubmit the shift for review.
Payroll Processing
- The ISS Payroll department will process submitted time for payment.
- If Payroll identifies an error with a shift, it may be sent back to the staff to make the necessary corrections. The shift will then need to be re-submitted to the circle for approval, and then resubmitted to ISS.
General Requirements
Portal Access
In order to use eTime, support staff must have a portal login. There must also be at least one individual in the participant’s circle of support who has a portal login and is designated a web approver. See the section “Web Approvers” below for more information.
Qualifying Jobs
eTime currently supports all ComHab, Job Coach, Job Developer, and Respite jobs. Paid Neighbor, Staffing Support, and Brokerage are not supported at this time.
Web Approvers
A web approver is any contact associated with a participant who is permitted to review and approve staff time. The participant and primary contact by default are always web approvers. Any other contact can also be designated as a web approver. Contact the participant’s SD Coordinator to add an individual as a web approver.
Navigating and Finding Shifts
Time is organized on two levels: the shift and the job period.
- Shift - a block of time defined by a start and end time; you can compare this to a single line on an old paper timesheet
- Job Period - a dynamic collection of all shifts falling within a specific date range (pay period) that all belong to the same participant, support staff, and job
- A support staff will have a different job period per job per participant.
- Likewise, a participant will have a different job period per job per staff person.
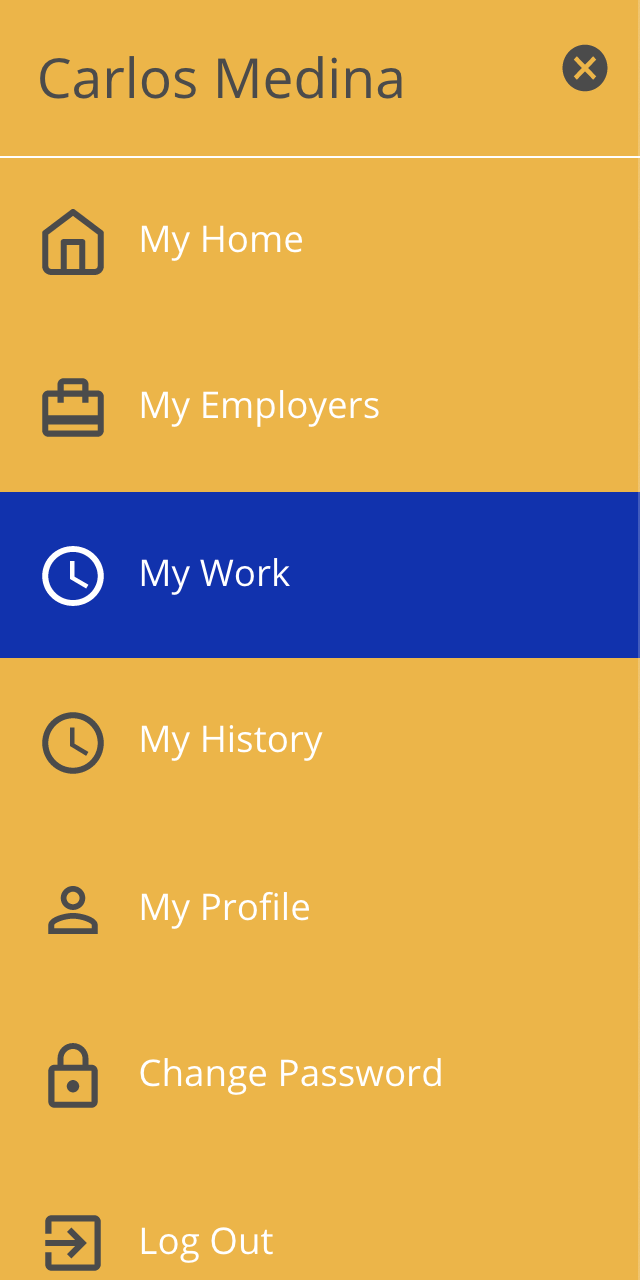
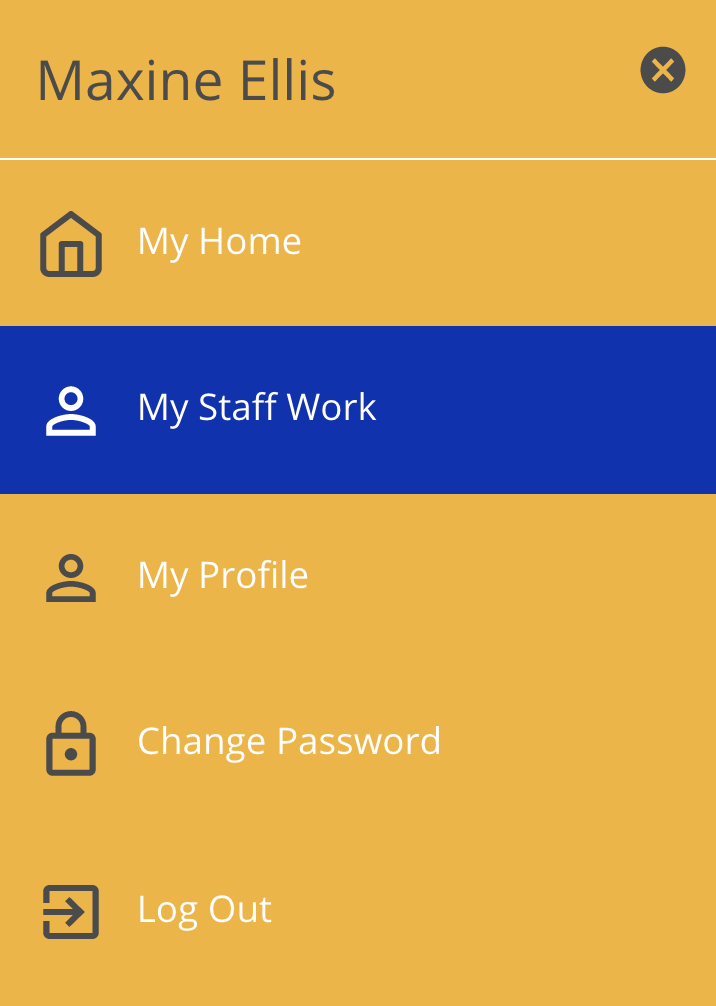
- In the main navigation panel, select either My Work (for support staff) or My Staff Work (for circle approvers).

- If you are both a support staff and a circle approver, you will see both options.
- My Work shows all eTime shifts that you have worked.
- My Staff Work shows all eTime shifts for participants for whom you are a circle approver.
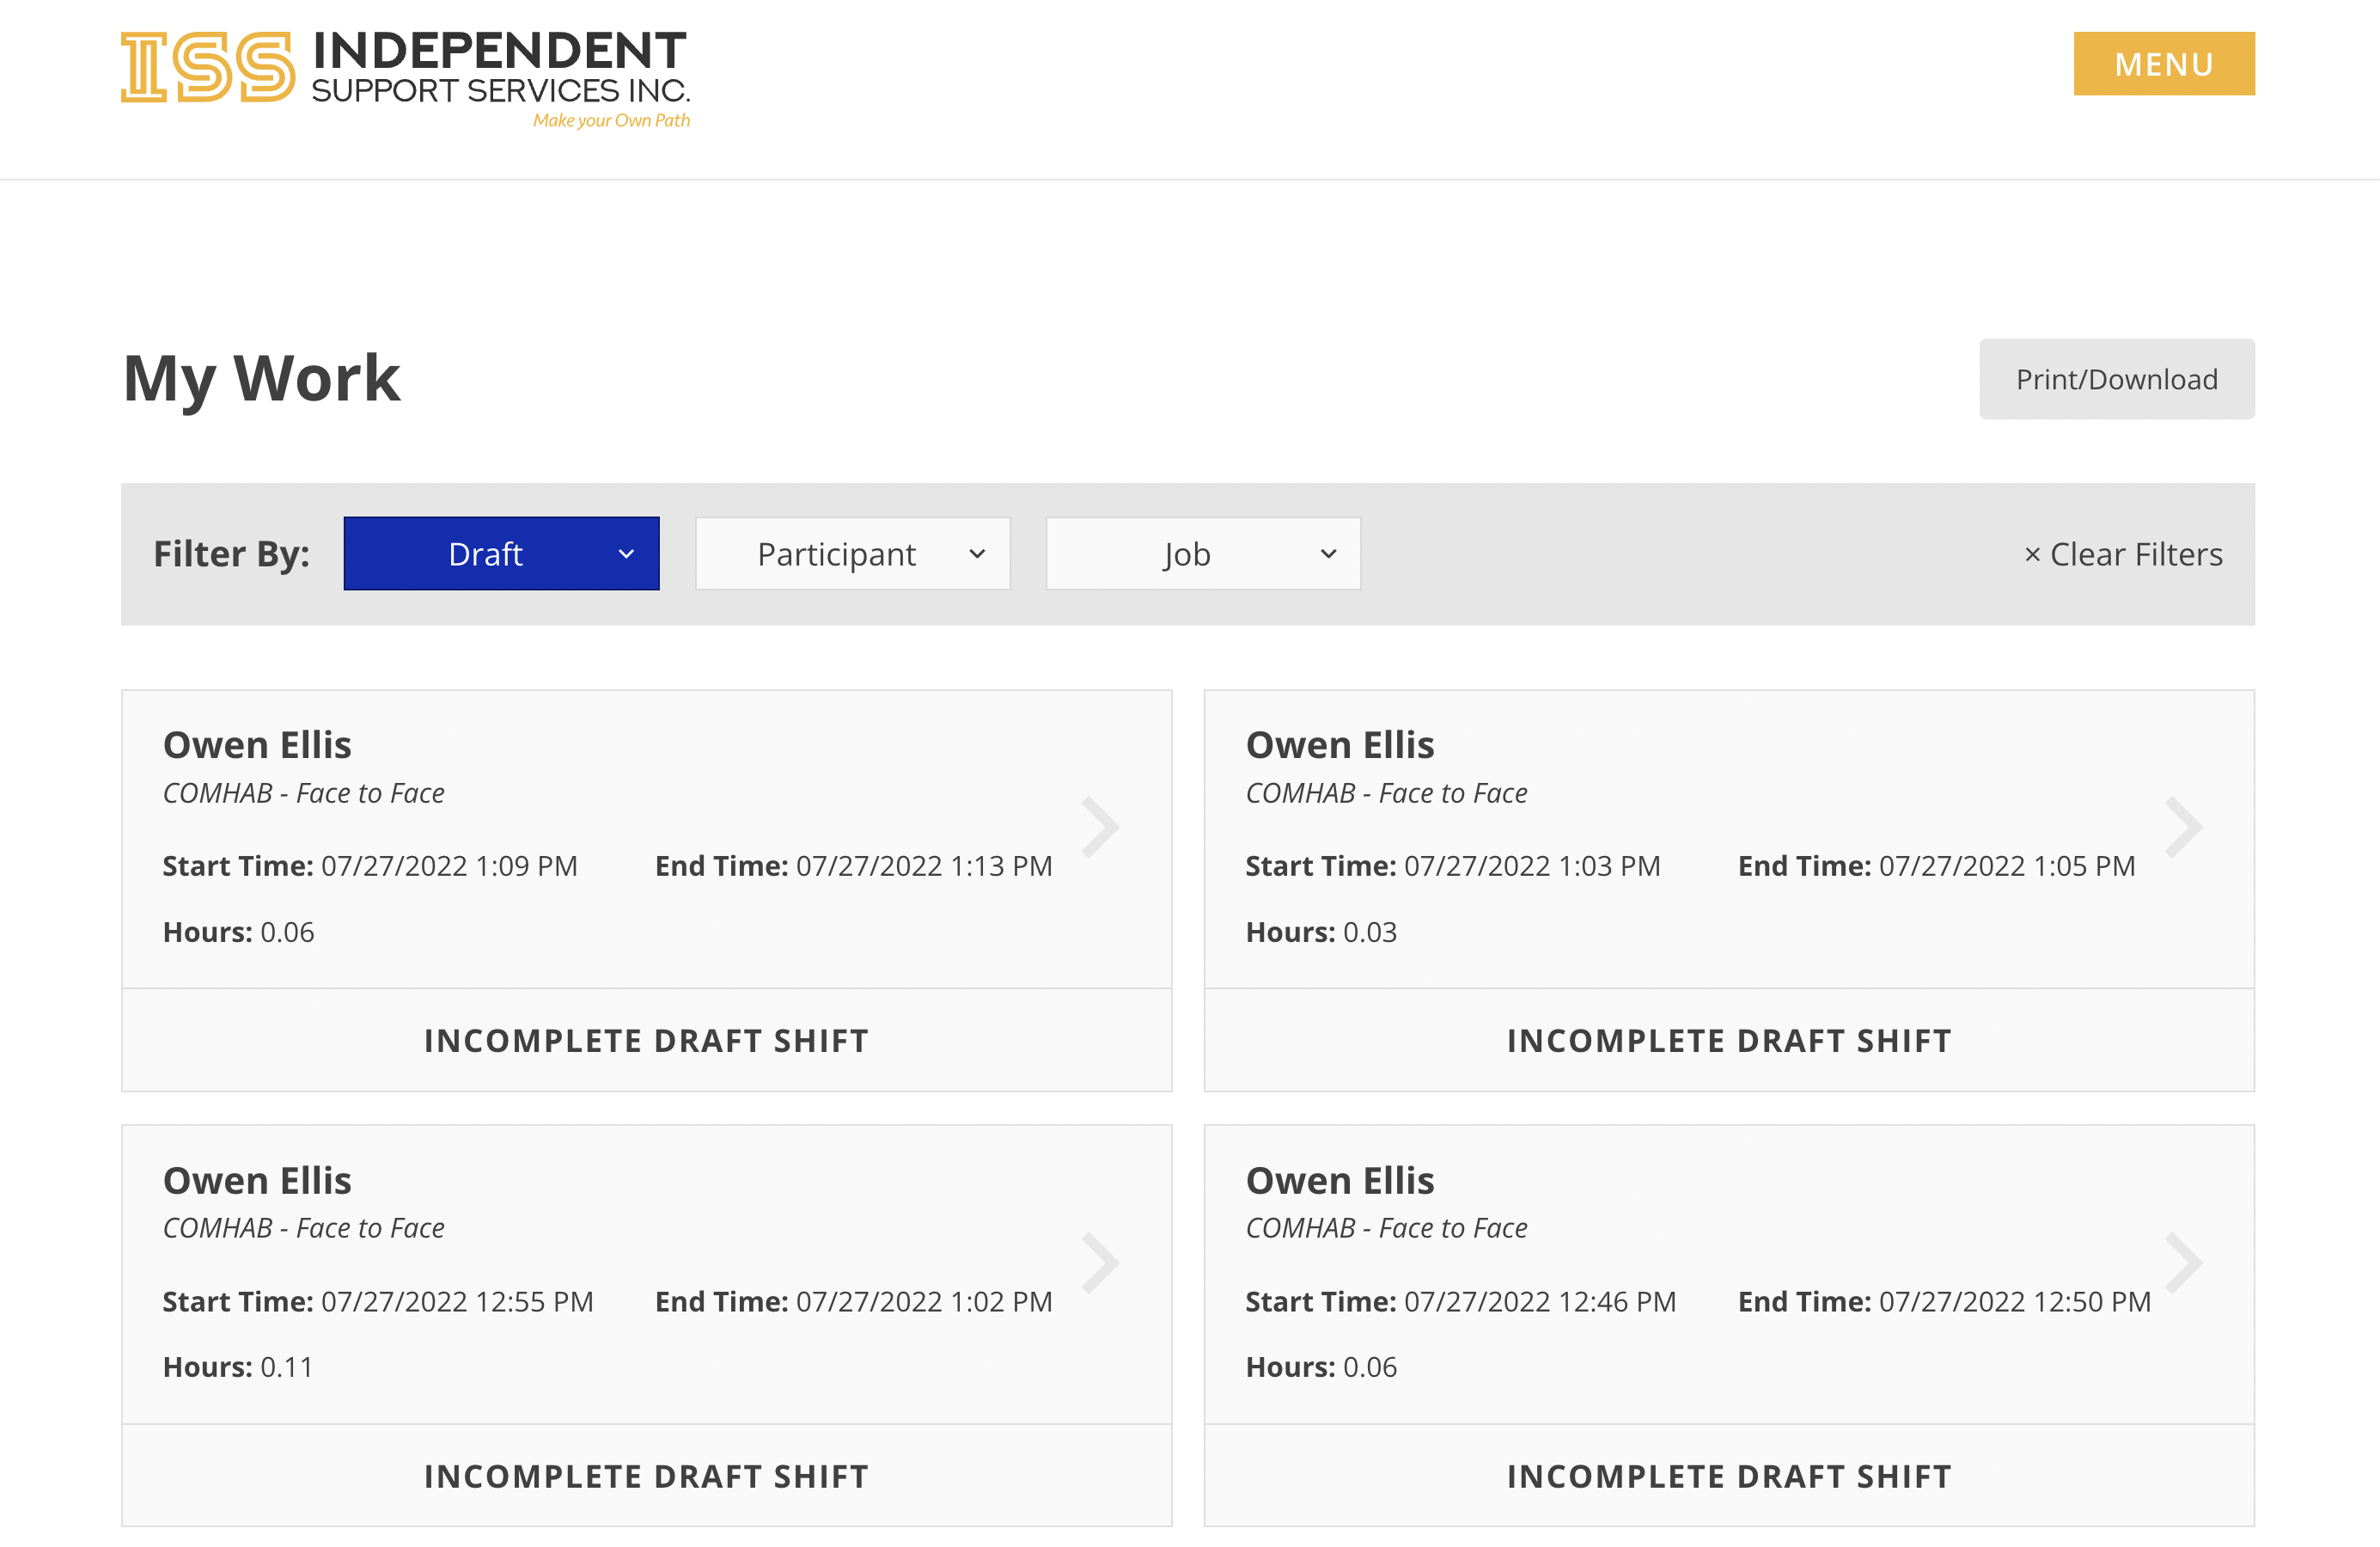
- All time entered via eTime will appear in the main body of the page.
-
- By default, this page will be filtered to shifts that have a status of All.
- Use the filter to view shifts based on their status, participant, or job.

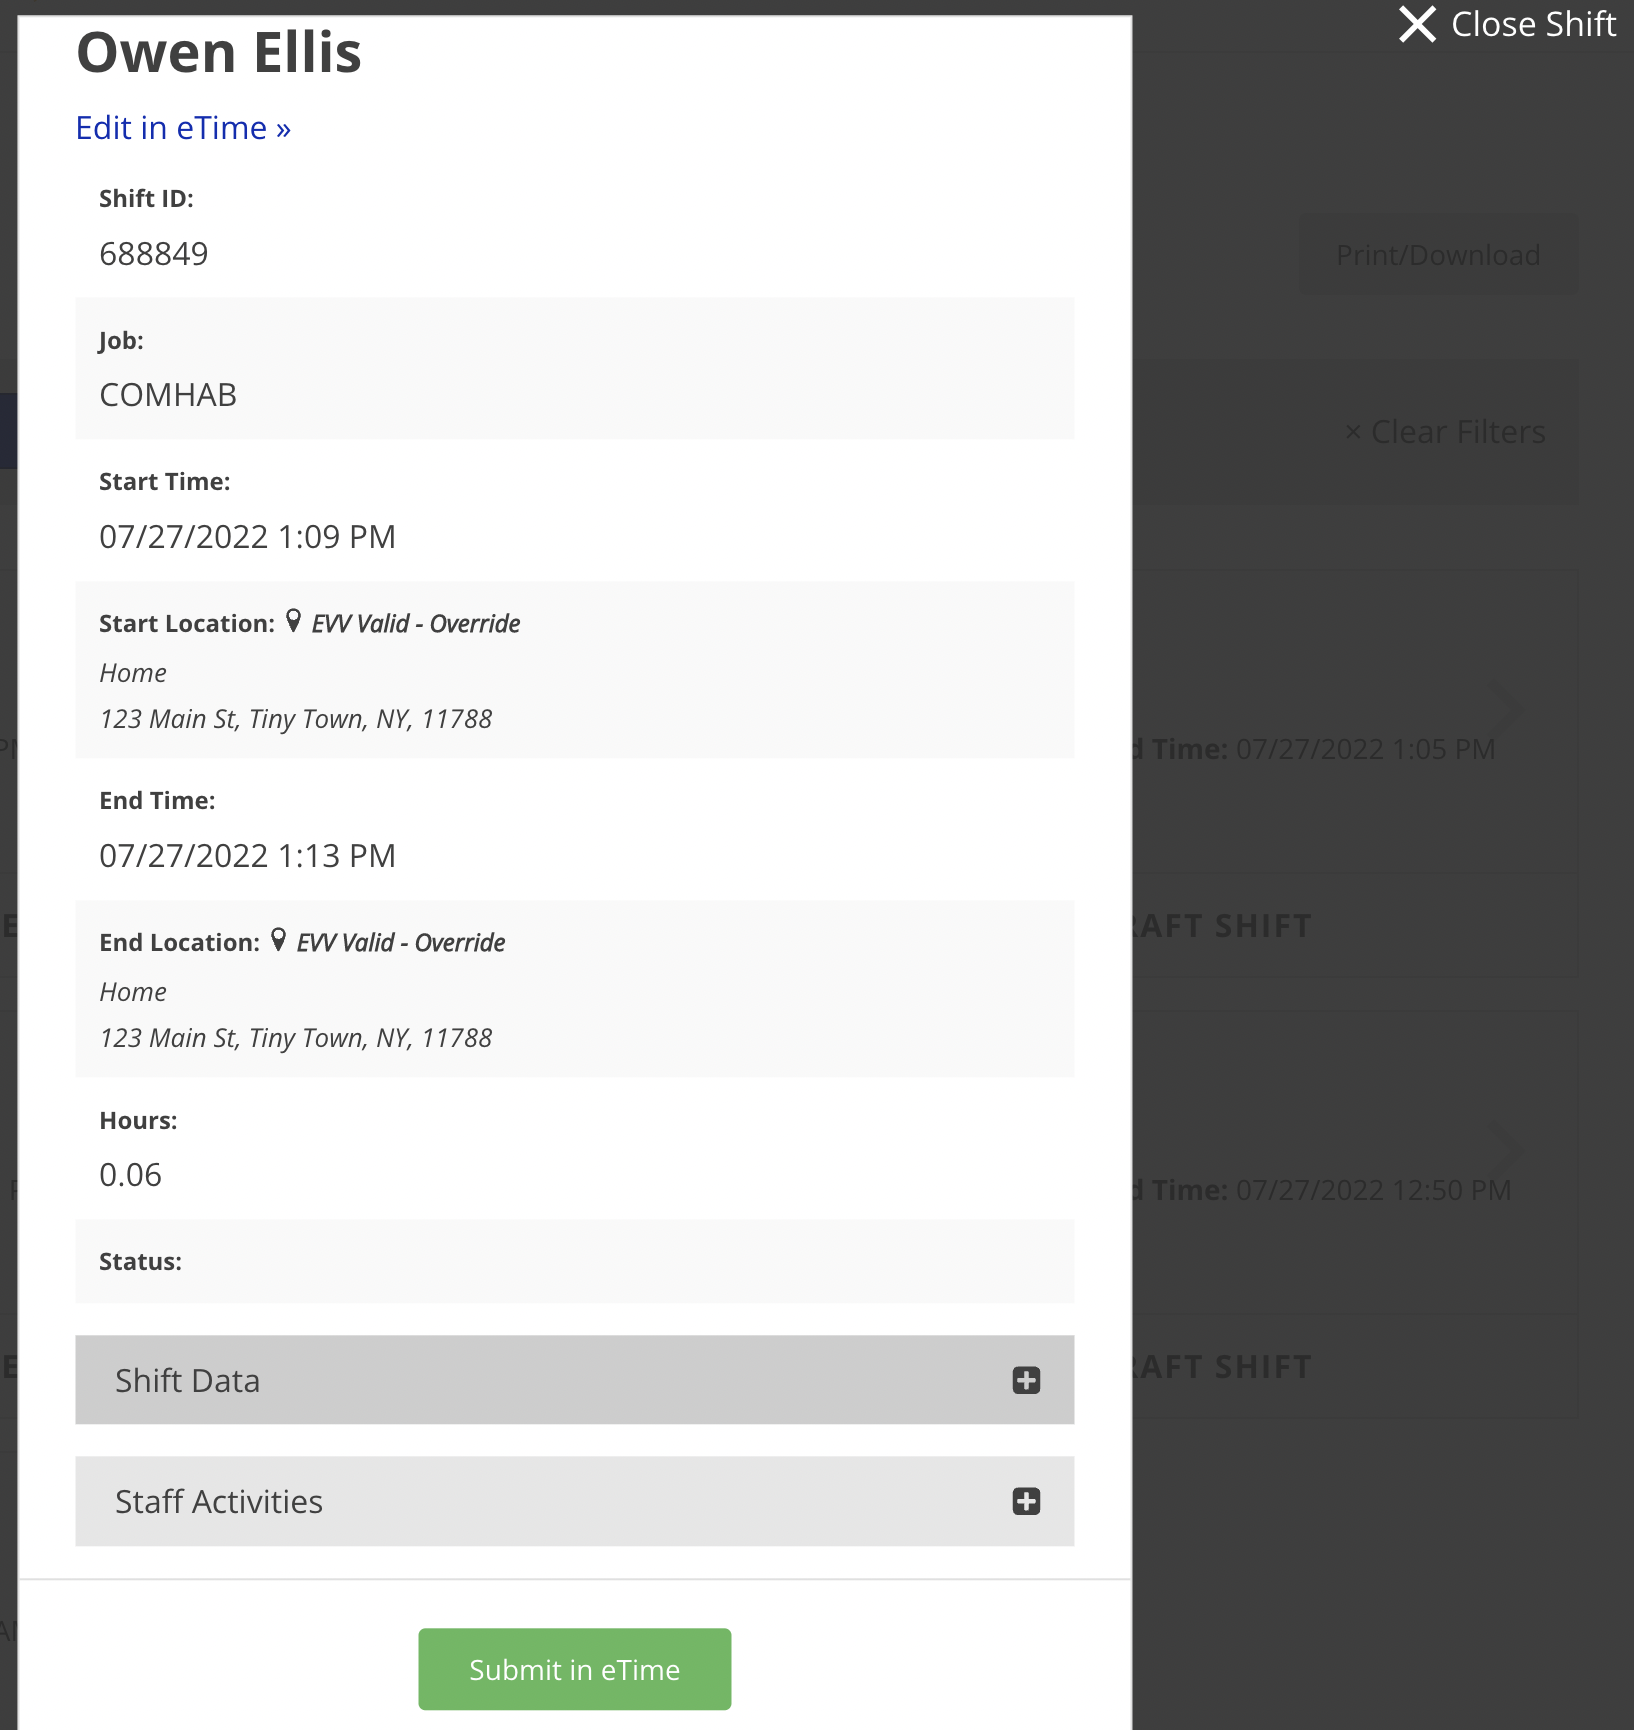
- To view a shift, simply click on the desired shift and a window showing the details of the shift will be displayed.

- If the shift is a draft, clicking Submit in eTime will submit the shift to the circle for approval. To close the window, click Close Shift in the top right corner.
Disclaimer: All names displayed in the above screen shots are fictional characters. No identification with actual persons (living or dead) is intended or should be inferred.
Updated 07/24/23.
Recording Time
Create a Shift
Did you accidentally start a new shift?
Edit a Shift
Submit a Shift
Shifts are submitted for approval on an individual basis.
Disclaimer: All names displayed in the above screen shots are fictional characters. No identification with actual persons (living or dead) is intended or should be inferred.
Updated on 04/24/24.
Adding Events to a Shift
Events are explicitly recorded timeframes within a shift. Events within a shift must be recorded because they effect what can be billed to Medicaid. They can be added to shifts of most job and method types. There is no limit to the number of events that can be added to a shift. An event can also span a fraction of a shift or the entire shift, as might be the case with training.
There are three (3) types of events, though not all available in all circumstances:
- Meeting - a meeting with the circle of support
- Training - the staff being trained, possibly at the same time as other staff
- Participant Absent - a period of time during the shift that the participant is absent
- Example: The staff person drives the participant to a doctor's appointment, waits in the lobby while the participant is in with the doctor, and then drives the participant home. This entire scenario is recorded as one shift, and a Participant Absent event is added to the shift for the time the participant was in the with doctor.
To add one or more events to a shift:
- When selecting activities, the events types at the top will be listed as default options in addition to the job-specific activities. Select the appropriate event checkbox to add it to the current shift.
- Not all events will be listed for every job and method combination. For instance, a Job Developer job will not have the Participant Absent option since it is not applicable.

- Not all events will be listed for every job and method combination. For instance, a Job Developer job will not have the Participant Absent option since it is not applicable.
-
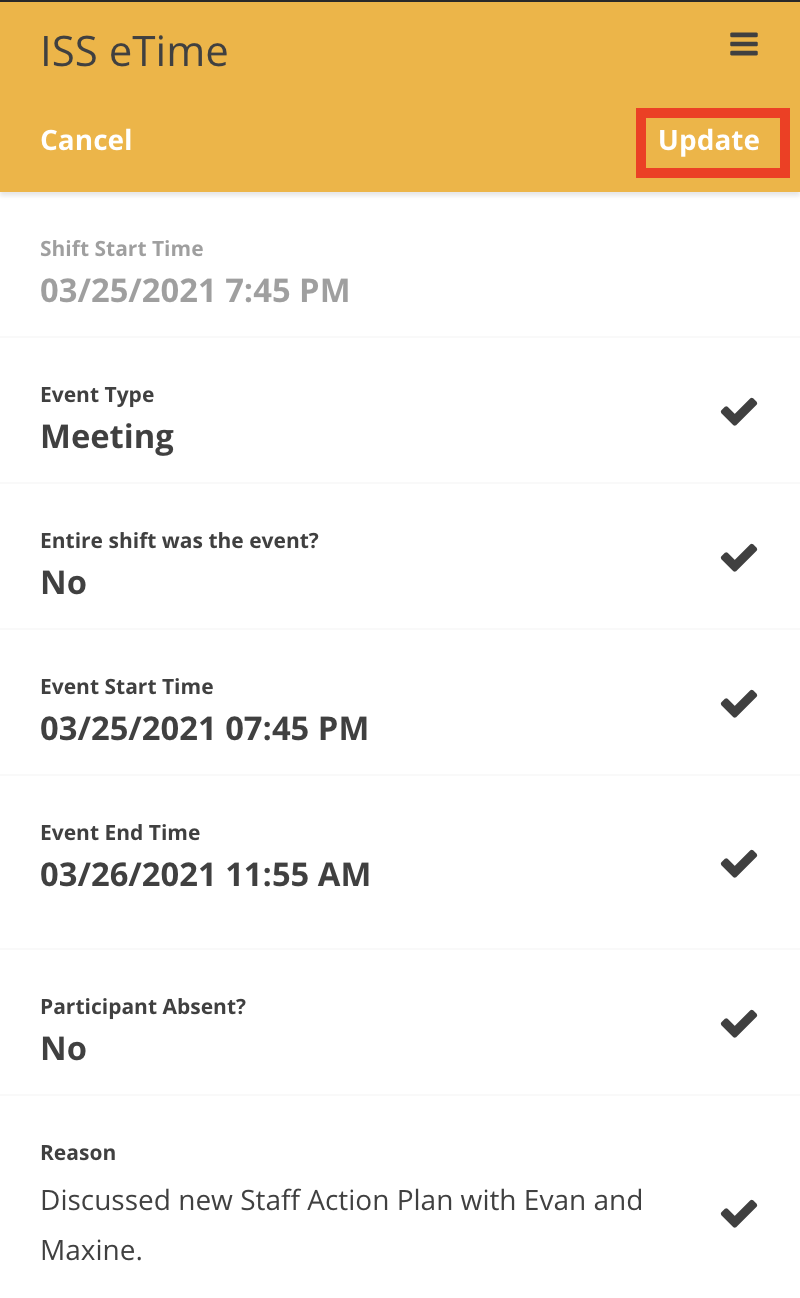
Once an event is selected, you will be taken to the Shift Event Details form. Fill in the details of the event and then click Update.
- If recording a training for a participant with IDGS Non Direct Clinician in his/her budget, see Special Cases.

- If recording a training for a participant with IDGS Non Direct Clinician in his/her budget, see Special Cases.
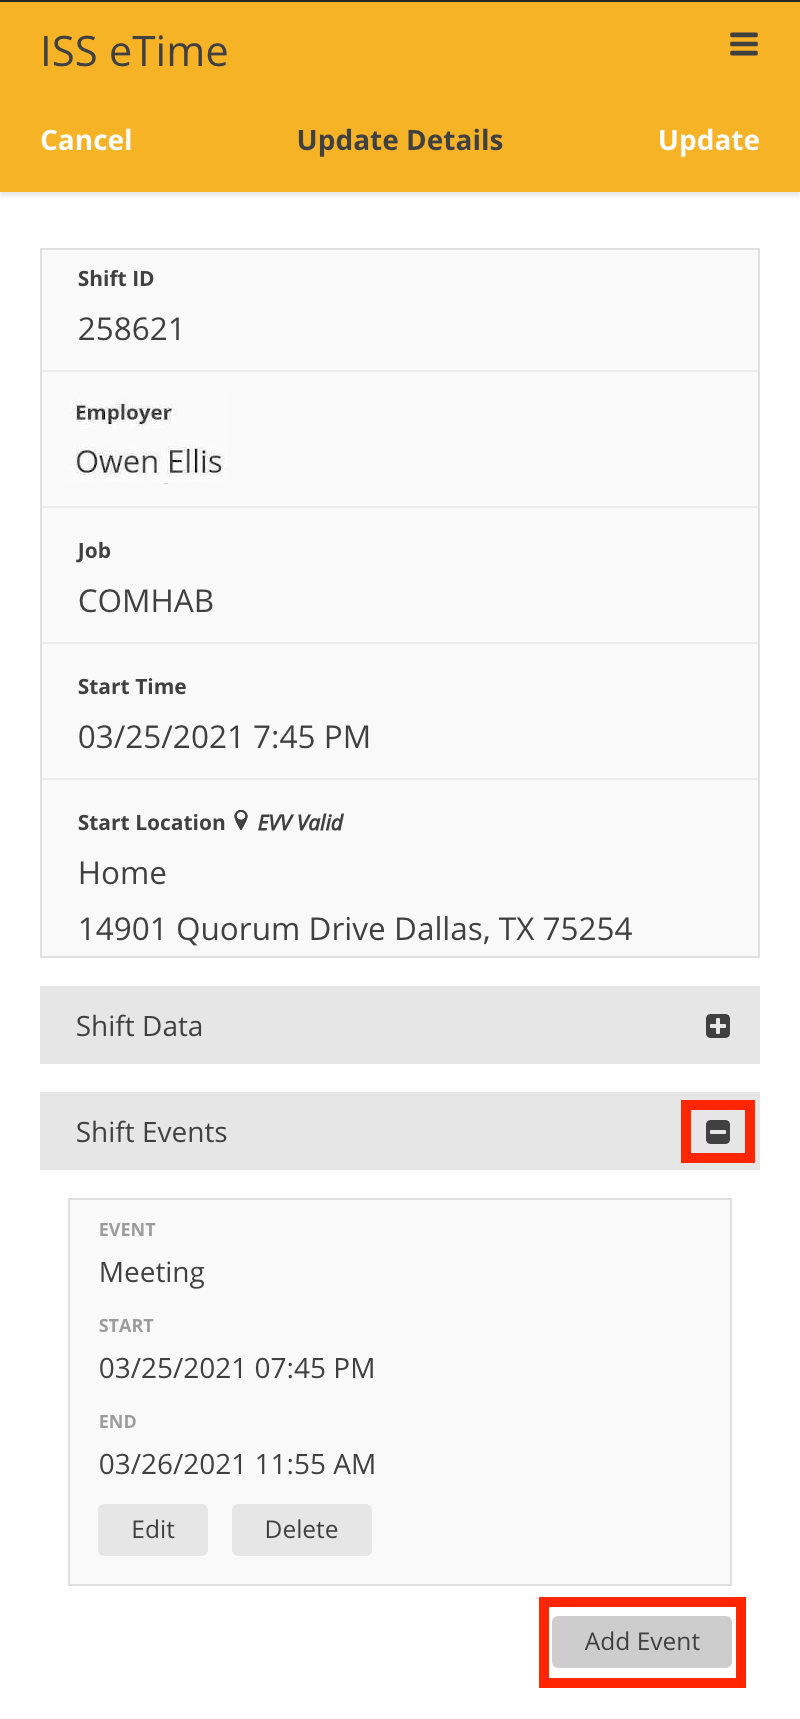
- To add additional events, click on the Shift Events section to expand it and then select Add Event.

-
As before, the Shift Event Details form is shown. Simply select the desired Event Type and fill out the form as you previously did earlier and then click Add in the top right corner once finished.

Disclaimer: All names displayed in the above screen shots are fictional characters. No identification with actual persons (living or dead) is intended or should be inferred.
Updated 2/13/2024
Editing Start and End Times
-
- Upon ending a shift and filling out the shift details, staff will be presented with the Final Review screen automatically. To get to this screen manually, select the shift in eTime, and then click Next on the Finalize Details screen.
- On the Final Review screen, click Change.
- Select either start time or end time.
- Modify the date and/or time as necessary.
- Note that any changes you make could result in the shift becoming EVV Invalid, depending on the relationship between the original start and end times captured when the shift was created and the modified start and end times.
- Provide a reason for this change. If this change is greater than 5 minutes, the circle approver will need to approve this as an Override Request and will see the reason you provide.
- Tap Change Start Time or Change End Time, depending which one you're editing.
- You will now see the modified time, as well as the original time listed below it.
- To revert to the original time, select the start or end time, then click Revert To Original.
- When you are done editing start and end times, tap Done or Back.
See more about EVV Override Requests in user story videos on adjustments.
Disclaimer: All names displayed in the above screen shots are fictional characters. No identification with actual persons (living or dead) is intended or should be inferred.
Updated 2/13/2024
Creating and Submitting a Forgotten Shift
**Creating a shift for a previous day will render the shift EVV Unverified. Continuous unverified shifts will be a cause for ISS intervention, as ISS may not be able to bill for those shifts.**
Please note, you cannot submit a missed shift while another shift is actively running
- To create and submit a forgotten shift, first navigate to eTime Live by clicking Open eTime on the home page.
- On mobile, eTime Live will automatically open upon login
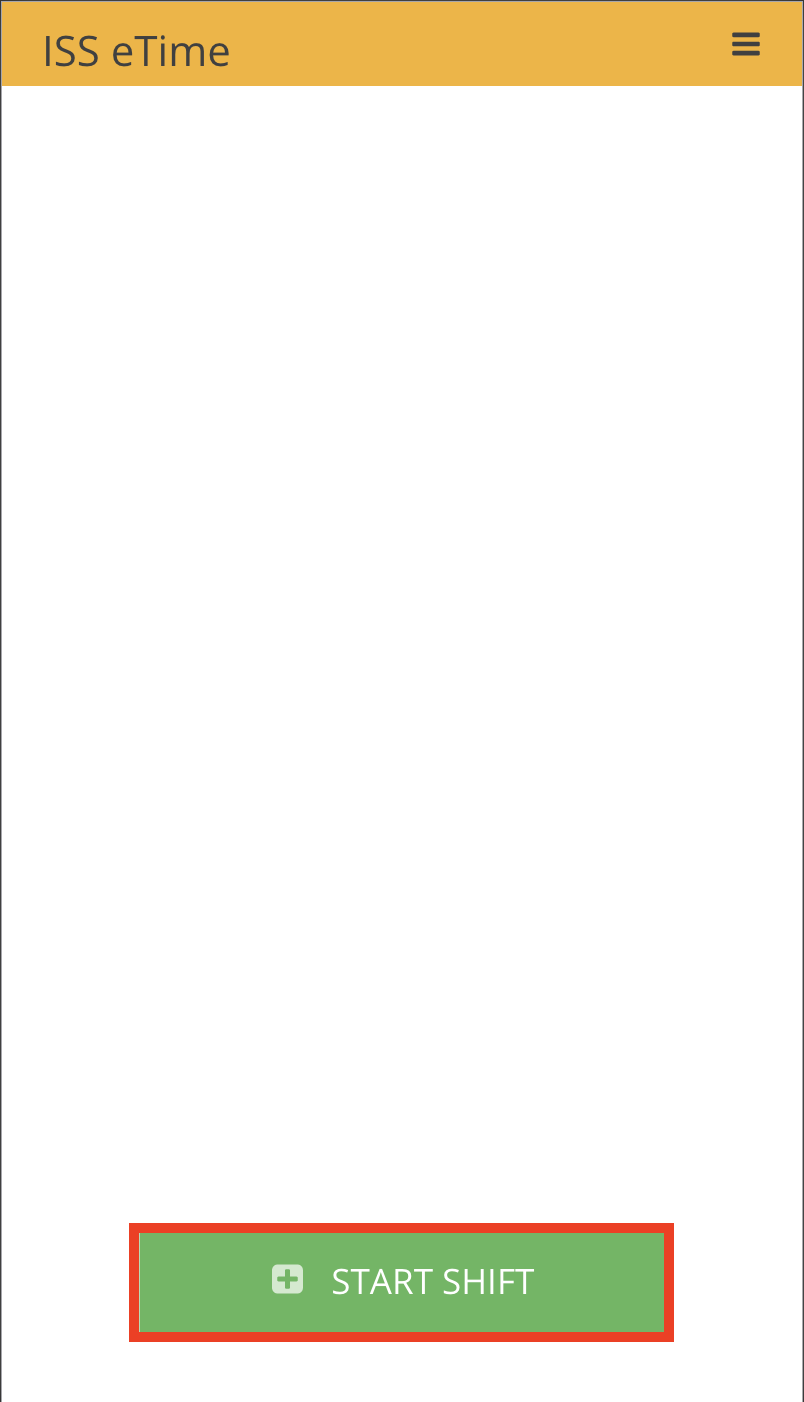
- From eTime, click Start Shift

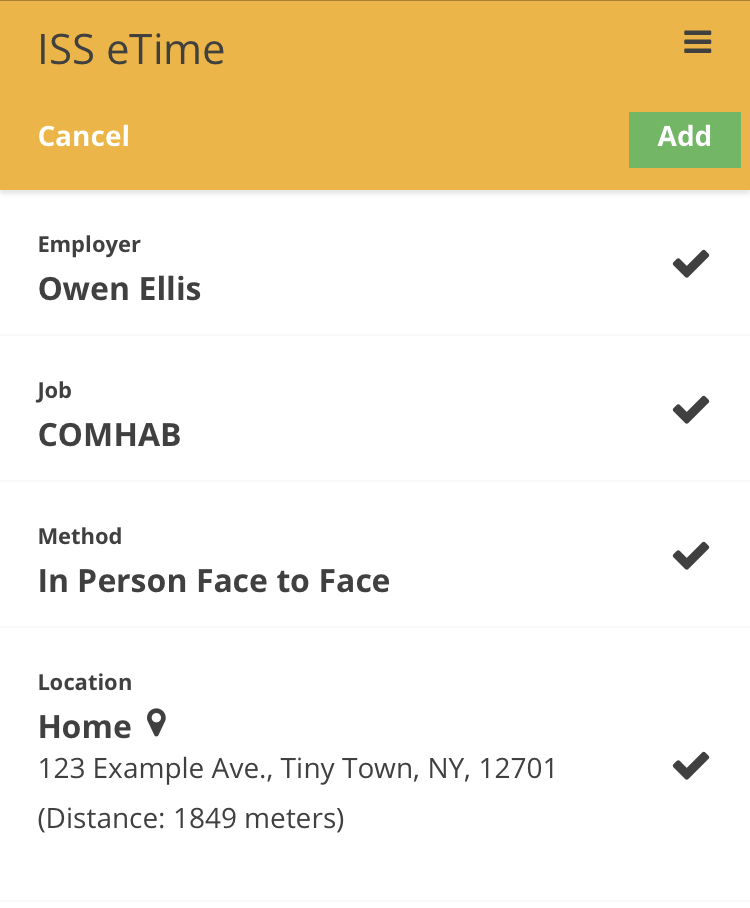
- Next, select the employer, the job, the method and the location for the forgotten shift
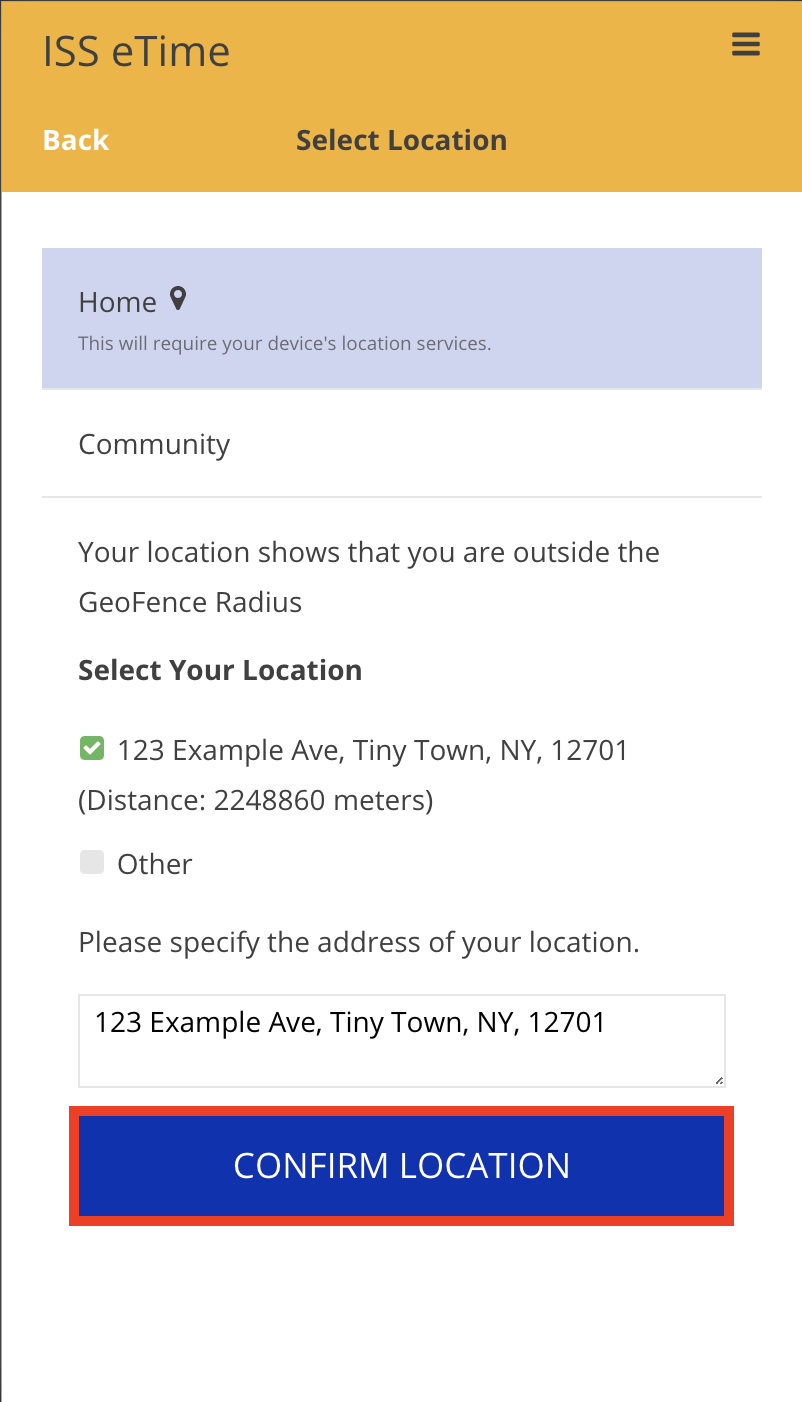
- If selecting an EVV required job and method, eTime Live may detect that the device location lies outside of the geofence. If this is the case, confirm the address where the forgotten shift began by clicking the checkbox next to the address and click Confirm Location

- If selecting an EVV required job and method, eTime Live may detect that the device location lies outside of the geofence. If this is the case, confirm the address where the forgotten shift began by clicking the checkbox next to the address and click Confirm Location
- Once the details of the forgotten shift have been confirmed, click Add in the top right hand corner
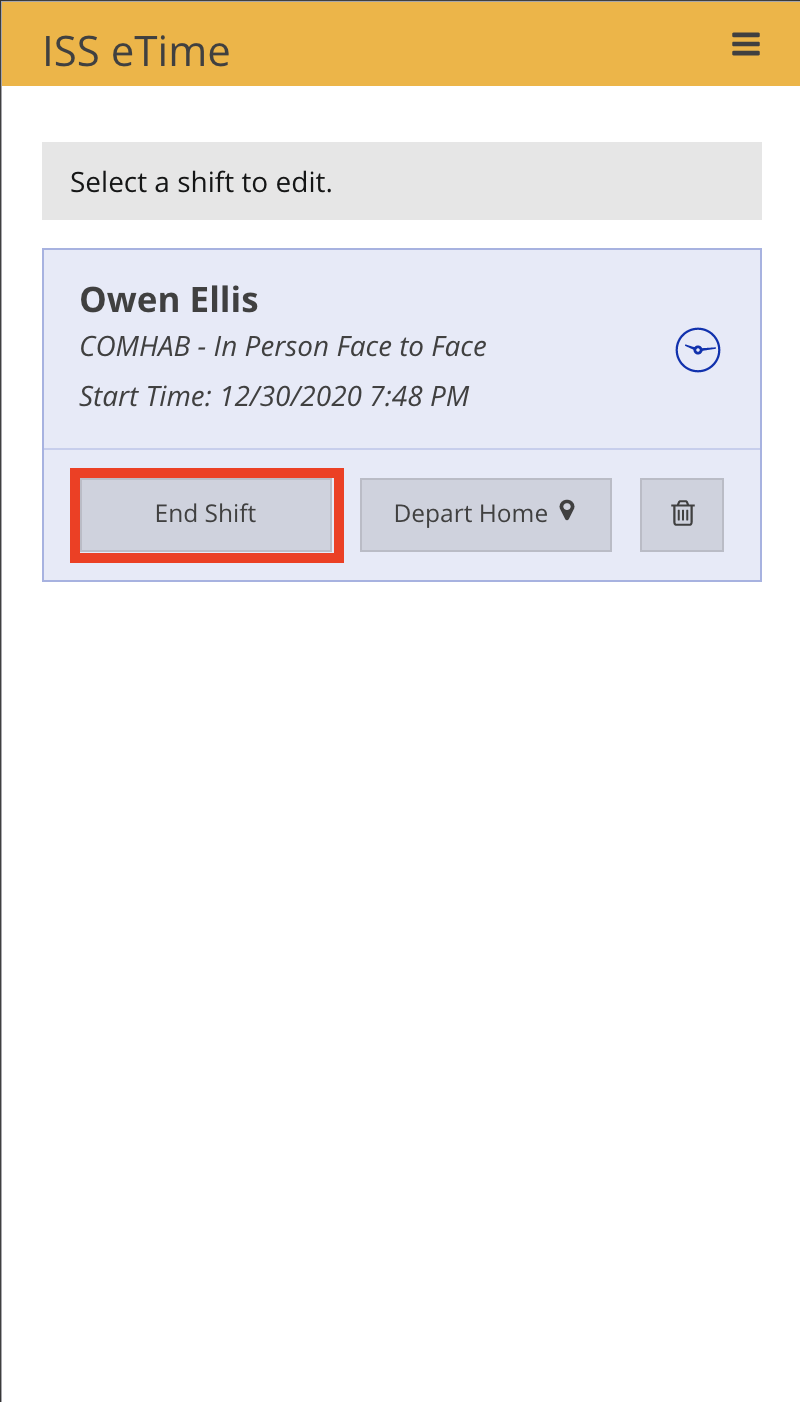
- Next, click End Shift to stop the eTime timer and verify that all Staff Activities have been logged for the forgotten shift

- Once all of the details have been finalized, click Next in the top right hand corner of the Finalize Details screen
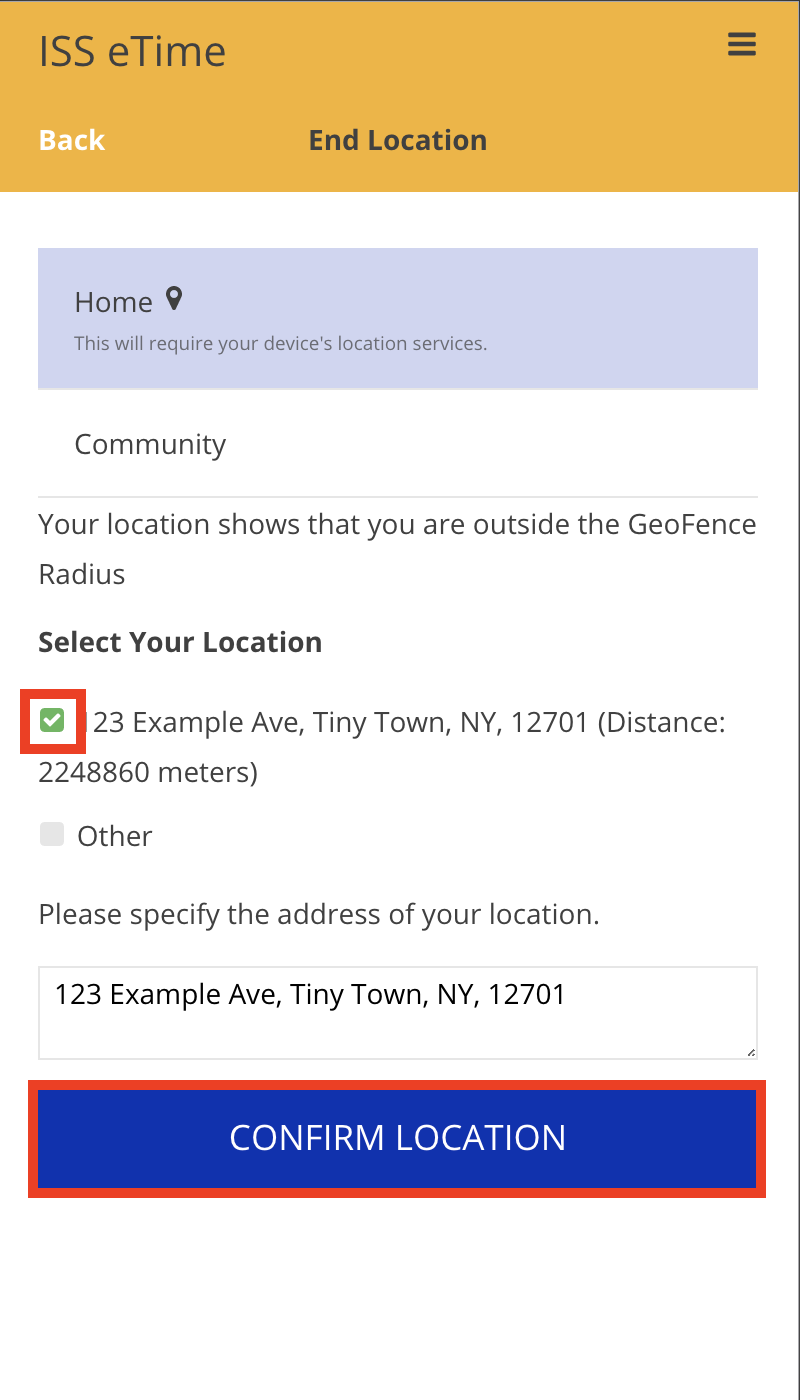
- Select the appropriate ending location for the shift
- If selecting an EVV required job and method, eTime Live may detect that the device location lies outside of the geofence. If this is the case, confirm the address where the forgotten shift ended by clicking the checkbox next to the address and click Confirm Location

- If selecting an EVV required job and method, eTime Live may detect that the device location lies outside of the geofence. If this is the case, confirm the address where the forgotten shift ended by clicking the checkbox next to the address and click Confirm Location
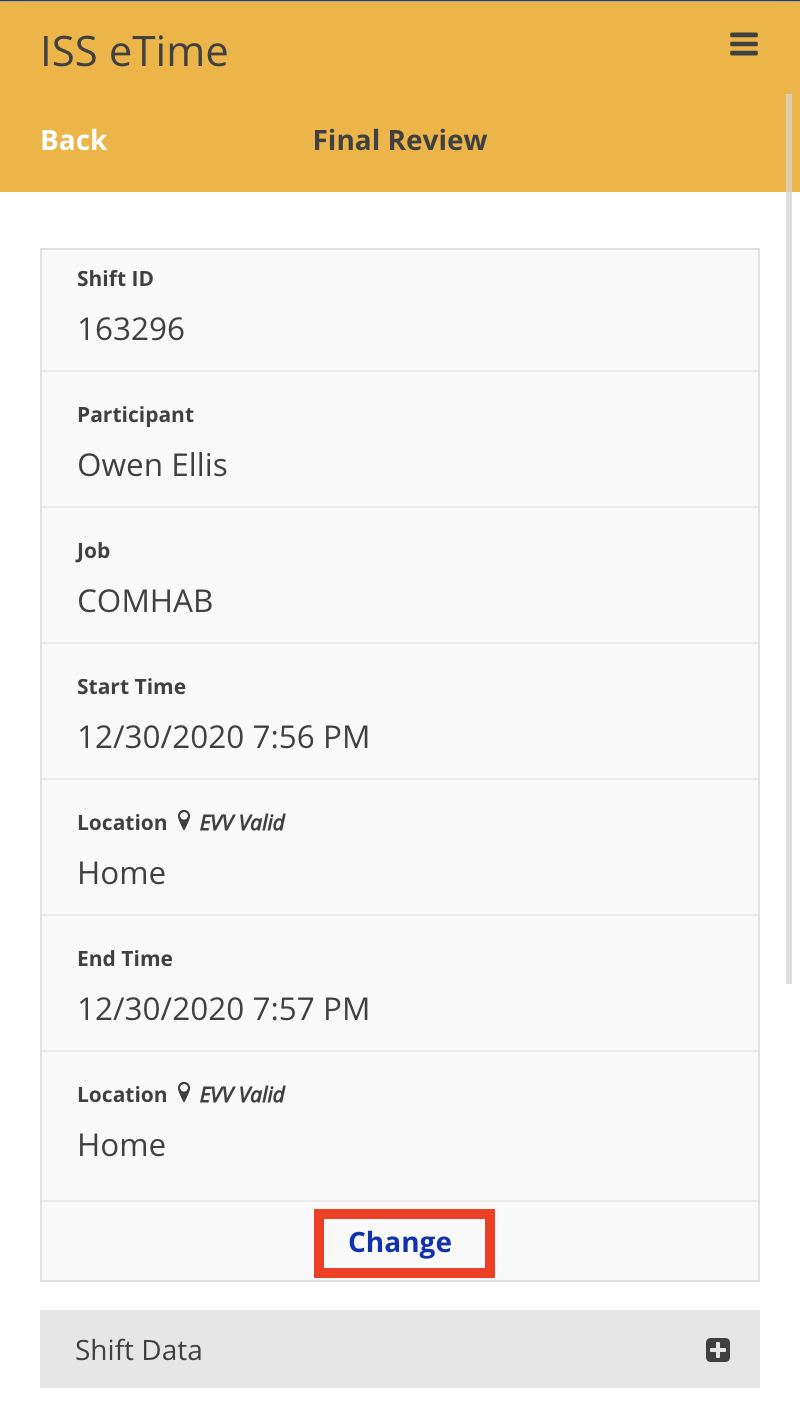
- Click End in the top right hand corner to advance to the Final Review screen
- From the Final Review screen, click Change

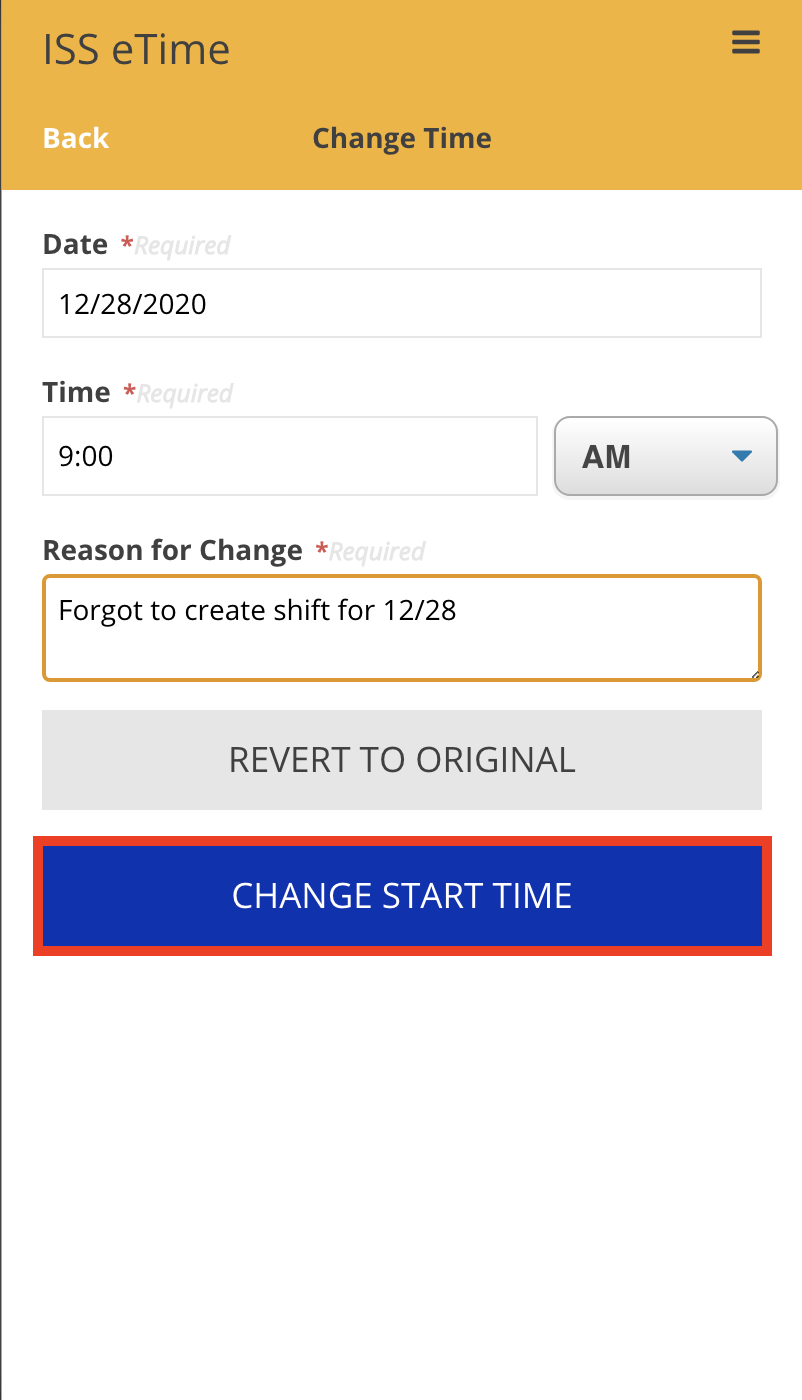
- Select the Start Time section to edit the start date, start time and to include a reason why the time and dates are changing for this shift

- Once finished, click Change Start Time to confirm the changes made

- Select the End Time section to edit the end date, end time and to include a reason why the end times are changing for this shift

- Once finished, click Change End Time to confirm the changes made

- After editing the Start Time and End Time for the forgotten shift, select Done to advance to the Final Review screen
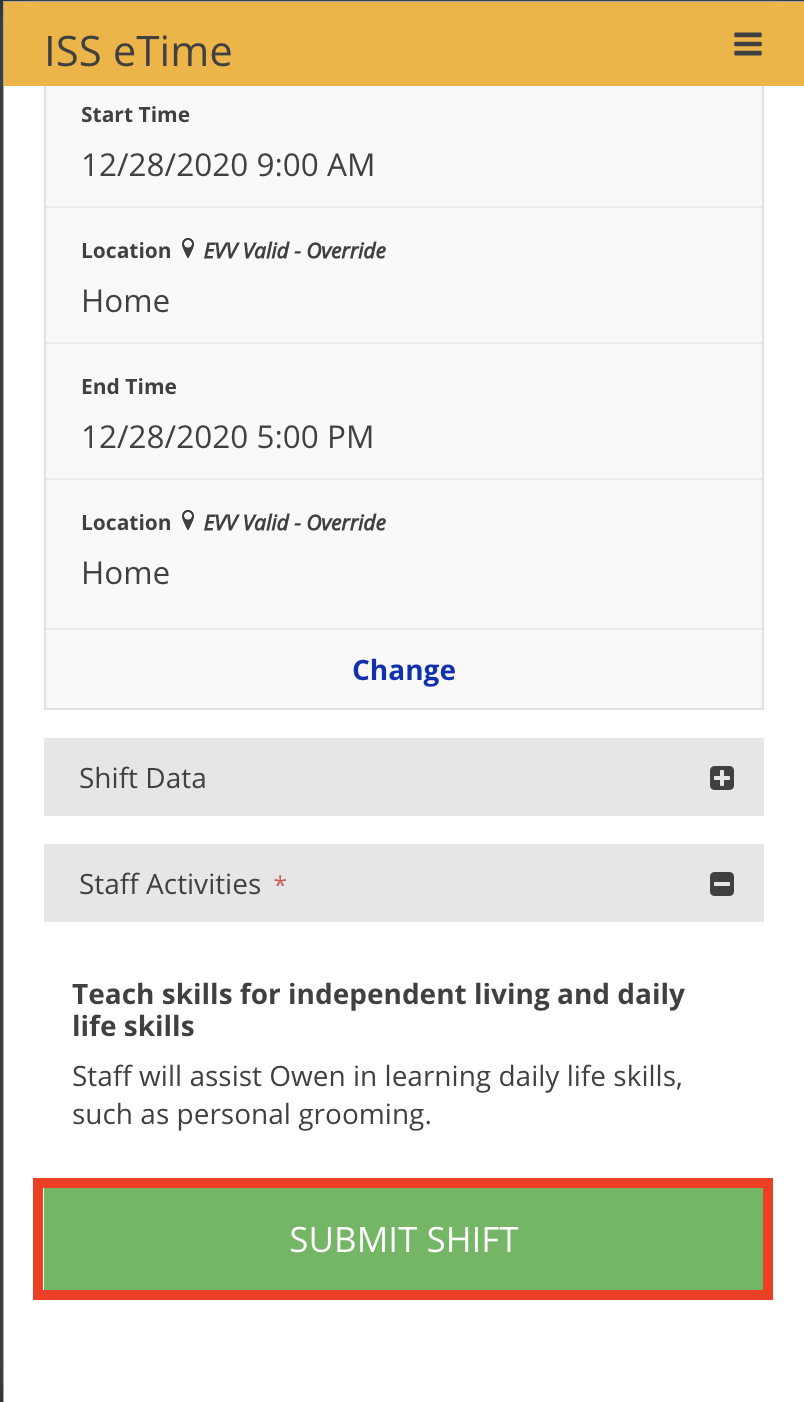
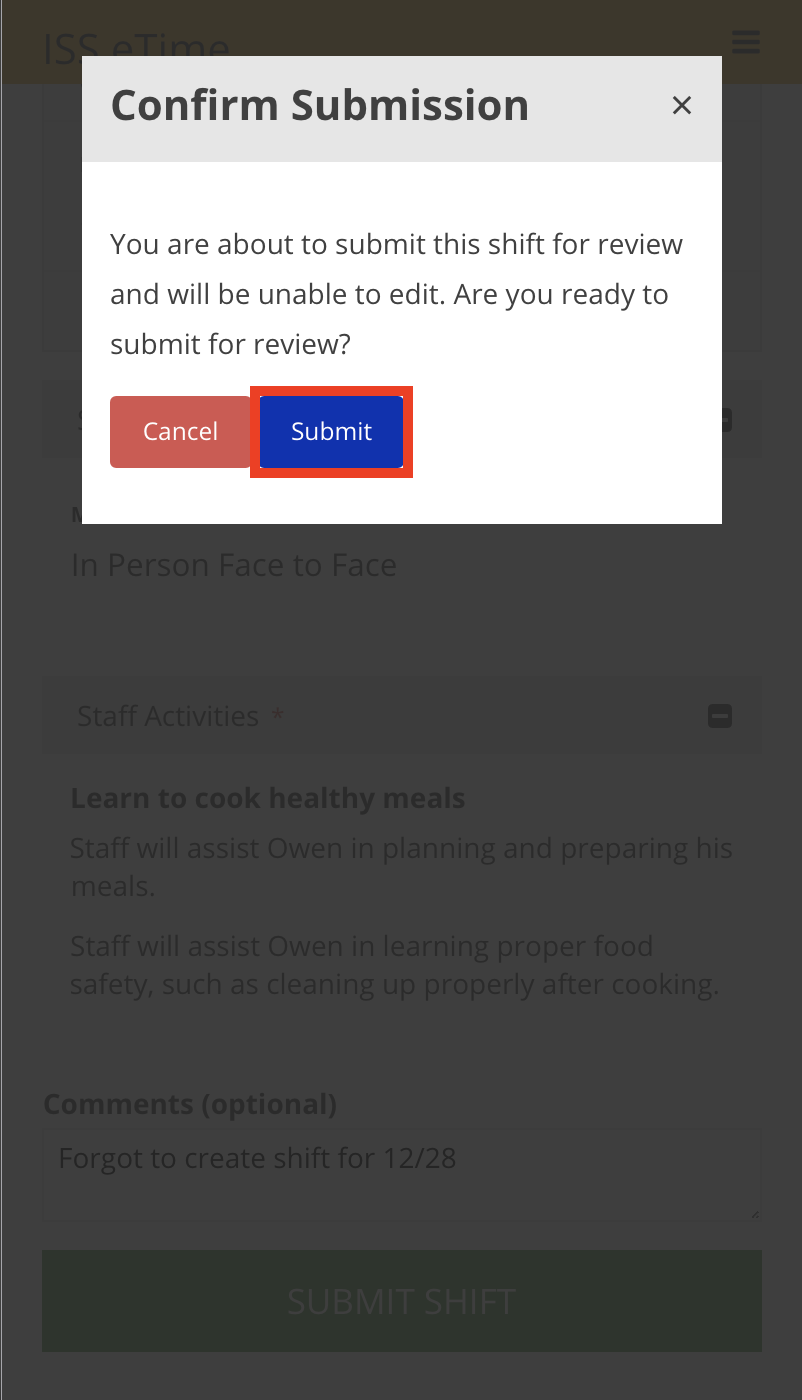
- From the Final Review screen, verify the accuracy of the shift’s details, scroll down and click Submit Shift at the bottom of the screen

- Click Submit from the Confirm Submission dialog window


Enabling Location Services
There are two places where location services must be enabled for eTime to have access to your location. They are:
- The device's operating system
- The web browser's security and privacy settings
Below are pathways on various devices to location services
iOS
Settings > Privacy > Location Services - Ensure this is On, and portal.issny.org is given permission.
Settings > Safari > Location - Ensure this is set to Ask or Allow.
macOS
System Preferences > Security & Privacy > Location Services - Ensure this is enabled, and the web browser you are using is given permission.
Safari
Preferences > Websites > Location - Ensure that portal.issny.org is set to Ask or Allow.
Chrome
Preferences > Privacy & Security > Site Settings > Location - Ensure that portal.issny.org is listed under Allow.
For more information about enabling location services, please visit the Enabling Location Services Help Guide section.
Fixing Location Inaccuracies
Outside The Geofence
When beginning or ending a shift, eTime may detect that you are outside of the geofence. When this happens, eTime will provide you with a list of addresses associated with your employer.
If the correct address is shown:
- Select the checkbox next to the correct address
- Click Confirm Location
If the correct address is NOT shown:
- Select the checkbox next to Other
- Type the correct address into the box
- Click Confirm Location
Completely Unable To Determine Location
It is possible that eTime may display an error stating that eTime was completely unable to get your location. When this happens, check the following:
- Verify that location settings have been enabled for your phone's operating system
- Verify that location settings have been enabled for your phone's browser
- Verify that portal.issny.org has been allowed to use your location
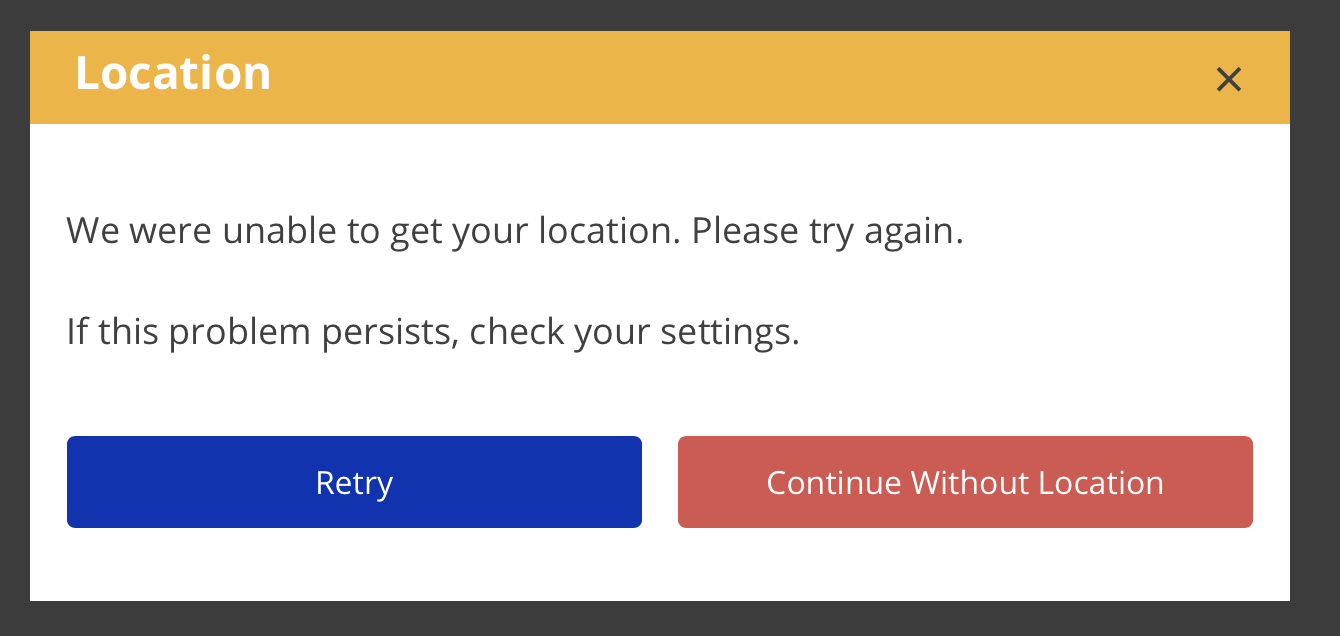
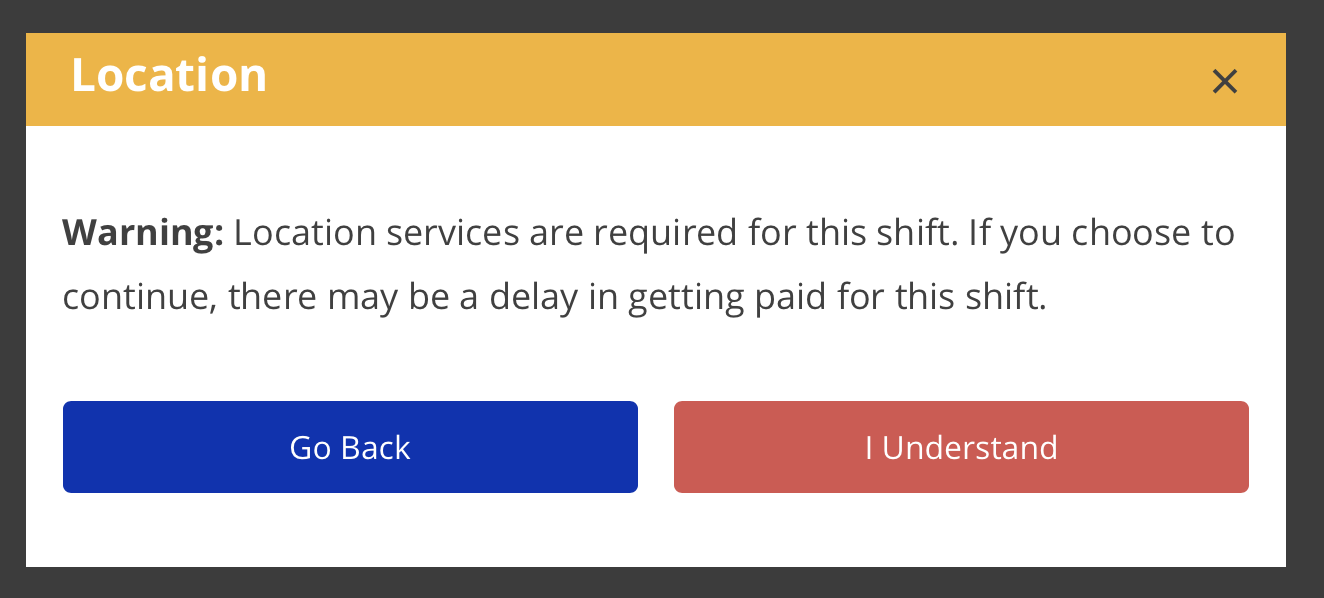
Once verified that all location settings have been enabled, return to eTime and click Retry on the error. If eTime is still unable to get your location, click Continue Without Location and then select I Understand on the second warning that appears.
**Note that selecting Continue Without Location will render the shift EVV Unverified. Continuous unverified shifts will be a cause for ISS intervention, as ISS may not be able to bill for those shifts.
For more information on enabling location services, please visit the Enabling Location Services Guide.
Disclaimer: All names displayed in the above screen shots are fictional characters. No identification with actual persons (living or dead) is intended or should be inferred.
Updated 2/13/2024
Location Services Help
If eTime is unable to get your location when you start or end a shift, you will be presented with an error dialog.
- Adjust your device and/or browser settings to enable location services.
- Click Retry.
- If this still does not work, you can continue without a location.
- Proceeding without a location is NOT recommended. Be aware that starting January 1, 2021, if you continue without location, the shift will be EVV Unverified. Continuous unverified shifts will be a cause for ISS intervention, as ISS may not be able to bill for those shifts.
For more information about enabling location services, please visit the Enabling Location Services Help Guide section.
Reviewing A Shift
The job of the web approver in the circle of support ("circle approver") is to act as the supervisor of the participant's support staff. That means reviewing and then approving or returning the time submitted by staff.
Time is submitted by support staff as individual shifts. Each shift must be individually reviewed and then approved or returned.
- Approving a shift submits it to ISS for payroll processing.
- Returning a shift returns it to the support staff for corrections with a return reason and description.
While reviewing time, the circle approver should look at the following:
- Dates and times - This includes location, duration, and any EVV Overrides.
- Job - Did this staff person work this job on this date for this participant?
- Method - Is the selected method correct?
- Learn more about method options.
- Activities - Are the selected activities correct?
- Events - Are the event details present and correct when applicable?
- Learn more about events.
- Overlaps - Ensure the shift does not overlap with another support staff working for the same participant at the same time.
To review time:
- Navigate to the My Staff Work page.

- My Staff Work shows all eTime shifts for participants for whom you are a circle approver.
- The Shifts tab by default shows all shifts needing action.
- The Job Periods tab shows a list of all open job periods; that is, all job periods that contain one or more in-progress shifts.
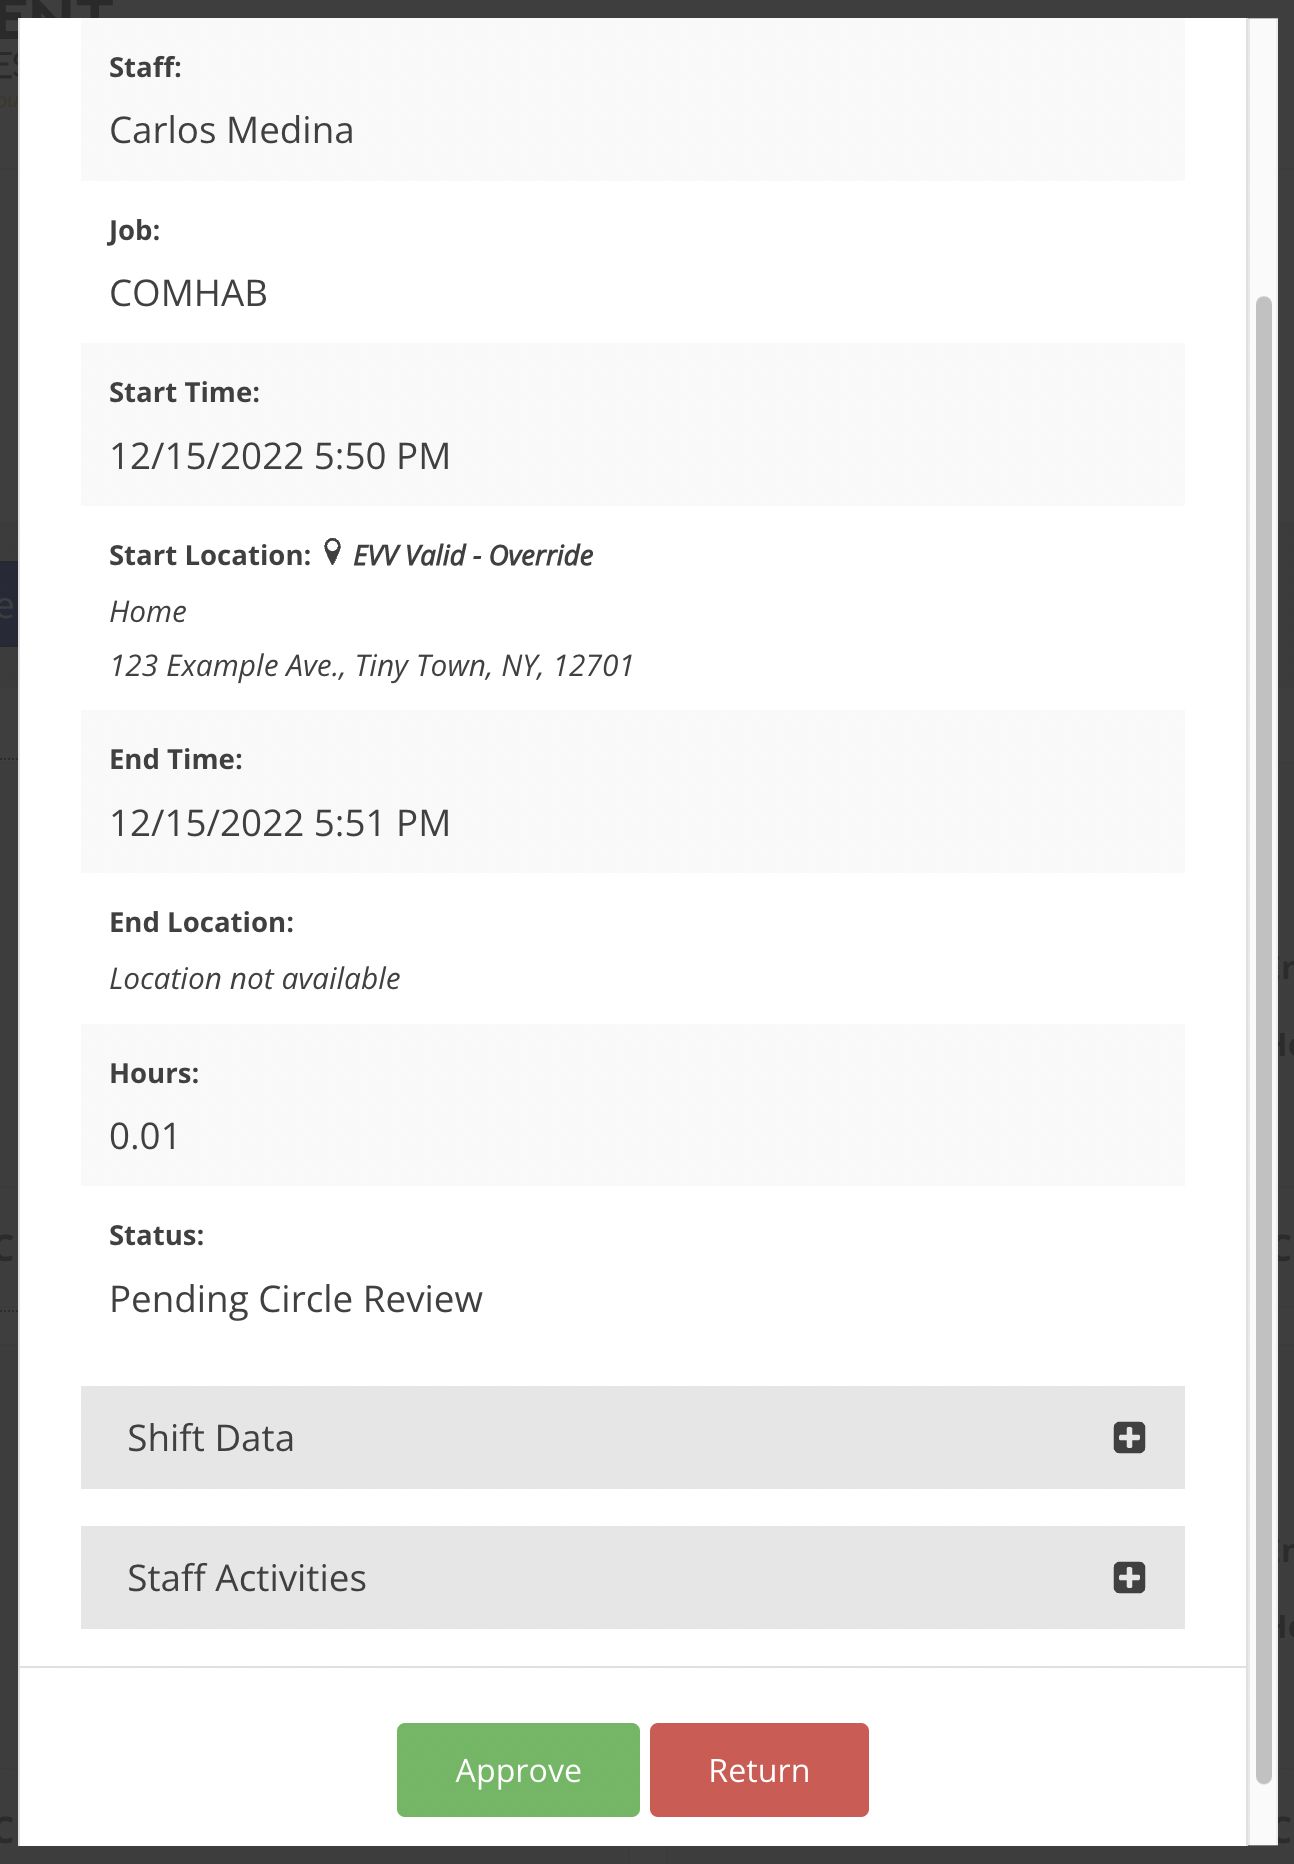
- Select a shift with a status of Pending Circle Review. This will open the shift from within its associated job period.

- Review the information entered for the shift (see the list above for things to look for).
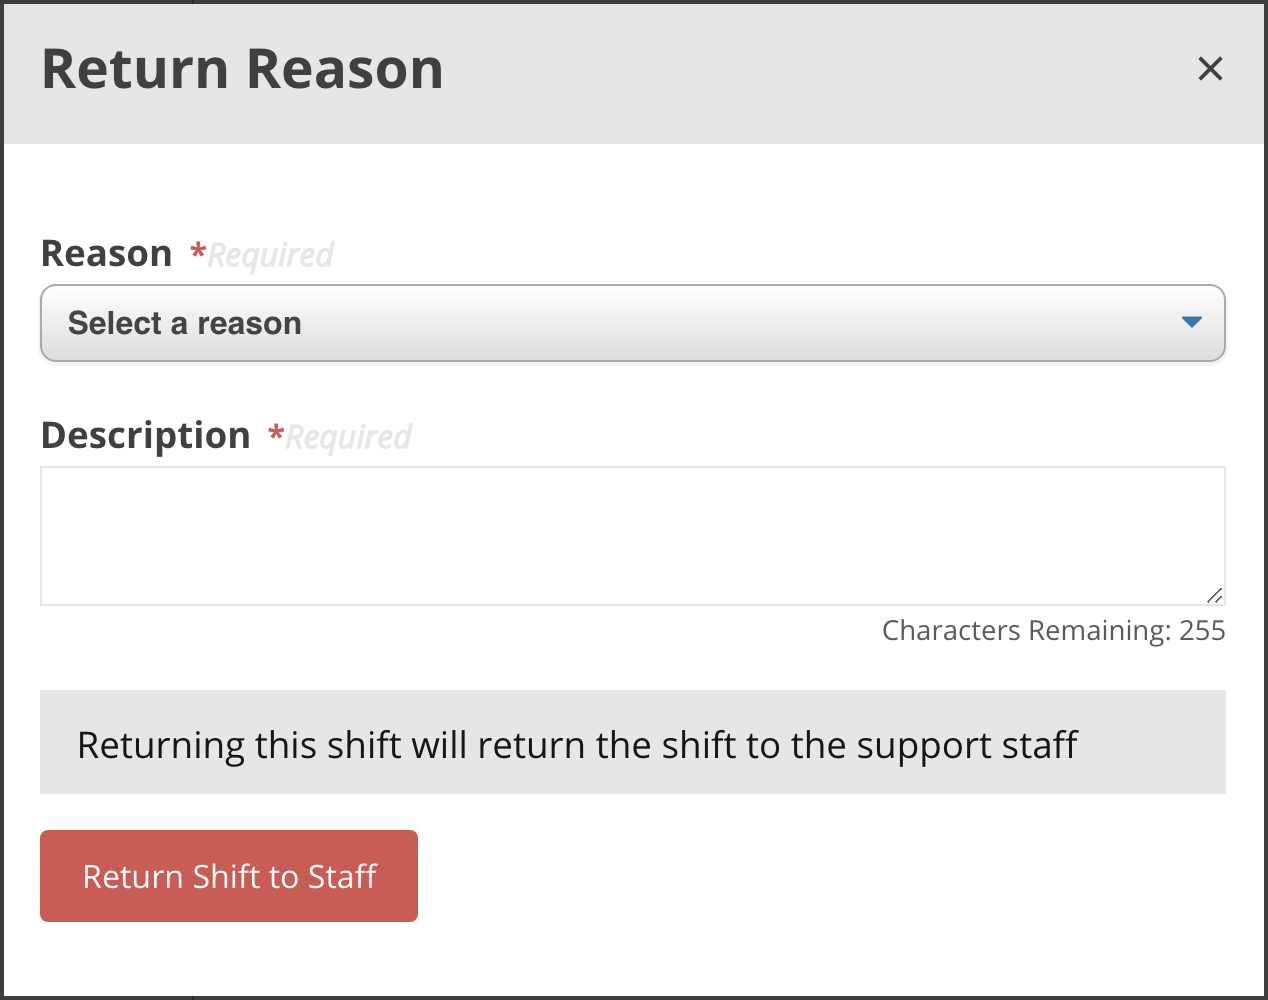
- If the information is correct, click Approve. If something is incorrect, click Return, then select a reason and provide a description.

- If the shift was returned, the staff will need to correct the shift and resubmit for approval.

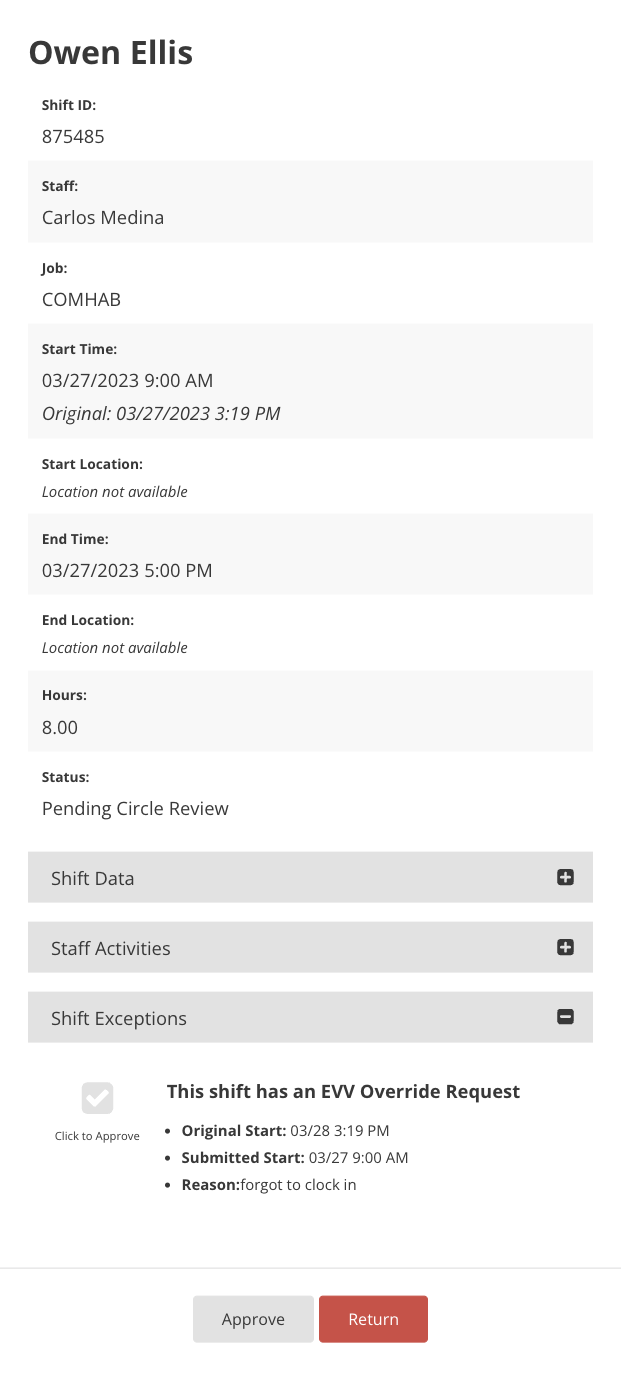
EVV Override Requests
If the staff has requested an override to the start and/or end time, that will be seen as an EVV Override Request. This request must be approved before approving the shift.
Disclaimer: All names displayed in the above screen shots are fictional characters. No identification with actual persons (living or dead) is intended or should be inferred.
Updated 07/24/23.
Viewing Shift Comments
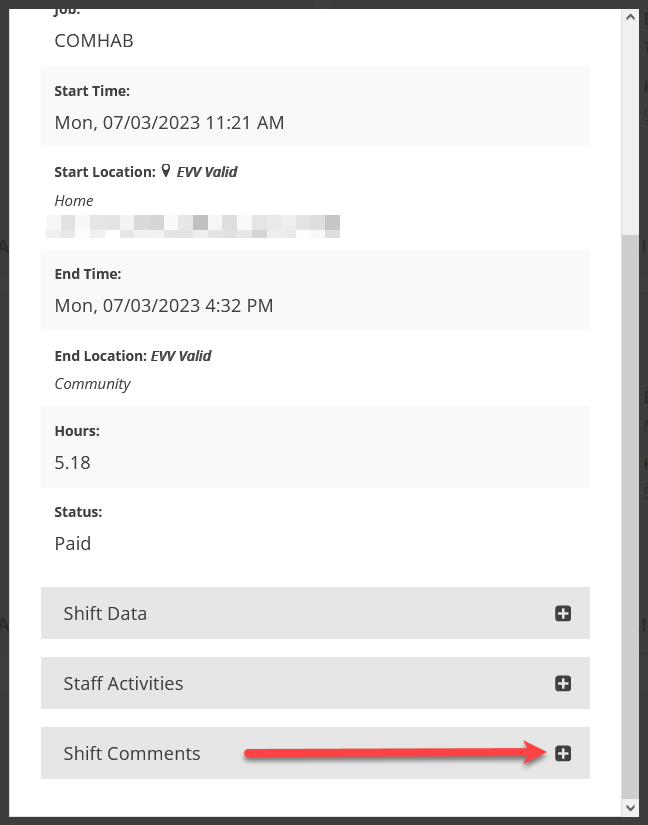
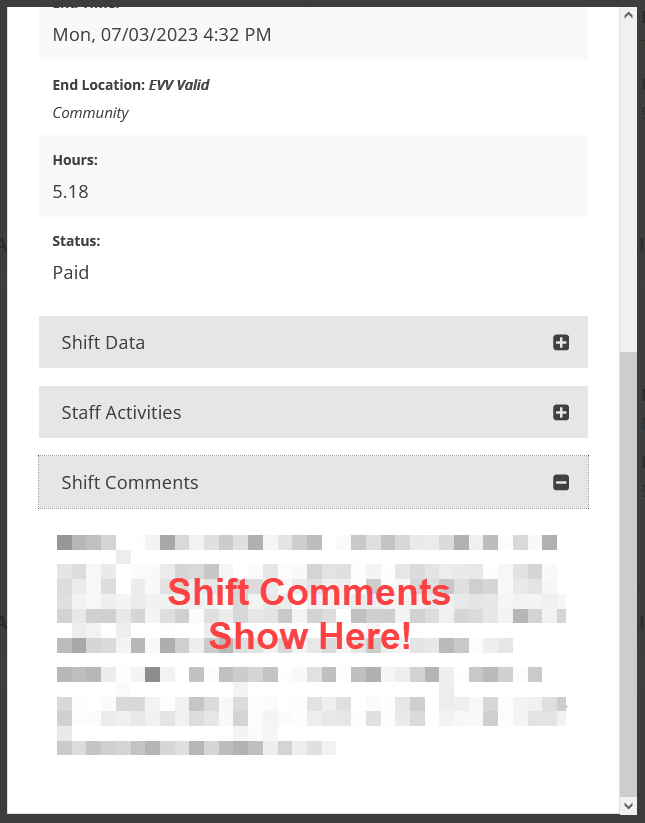
If a comment was added by staff on a shift, you can view them in two locations: on the shift details screen and on the Print/Download PDF.
Shift Details Screen
If a comment was added, the Shift Comments section will display. Click the plus sign on the right to expand it. The section will only display if a comment was added.
Collapsed:
Expanded:
Print/Download PDF
If a comment was added, the Comments section will display below the shift details and above the Staff Activities on the PDF.

Updated 02/23/24.
Correcting a Shift
A shift can be returned for corrections by either the circle approver or by the ISS Payroll department. In both cases, the support staff will receive an email notification that they have time to correct. In eTime, you can see that a shift has been returned because it shows up with a red indicator.
A shift cannot be paid until corrections are made and the shift is resubmitted and approved.
To correct a shift:
Updated 2/13/2024
Requesting/Submitting Time Off
The 7 types of time off:
- PTO (Paid Time Off)
- FAPTO (Family Approved Paid Time Off)
- Holiday
- Bereavement
- Jury Duty
- VXPAY (Vaccination Paid Time Off)
- PREG
Time Off can only be submitted two months into the future.
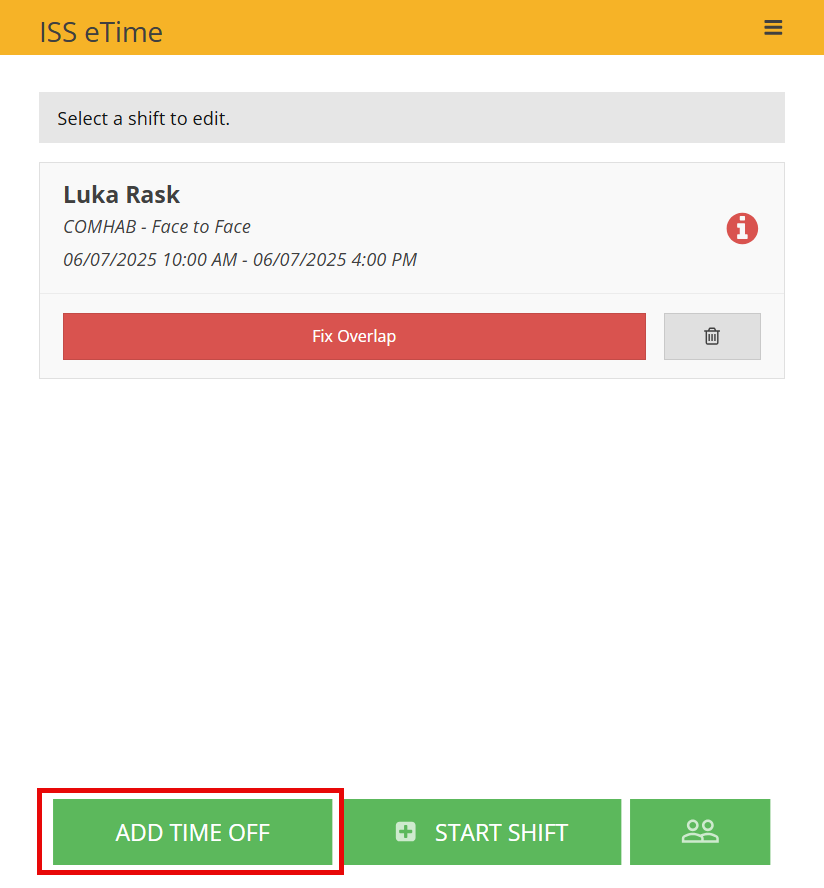
To request or enter time off from eTime:
- Click Add Time Off at the bottom of eTime.

-
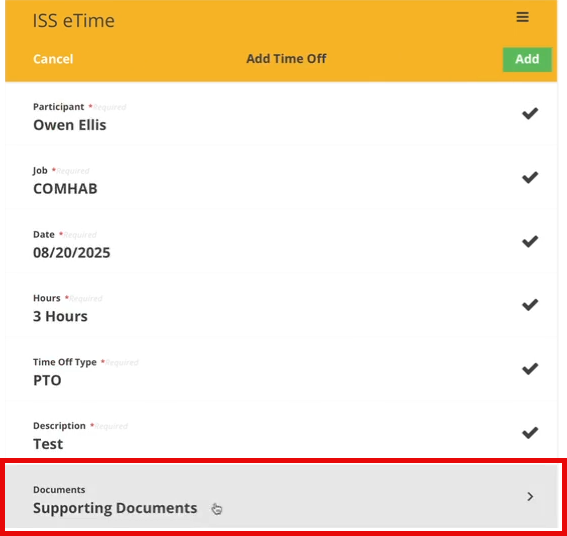
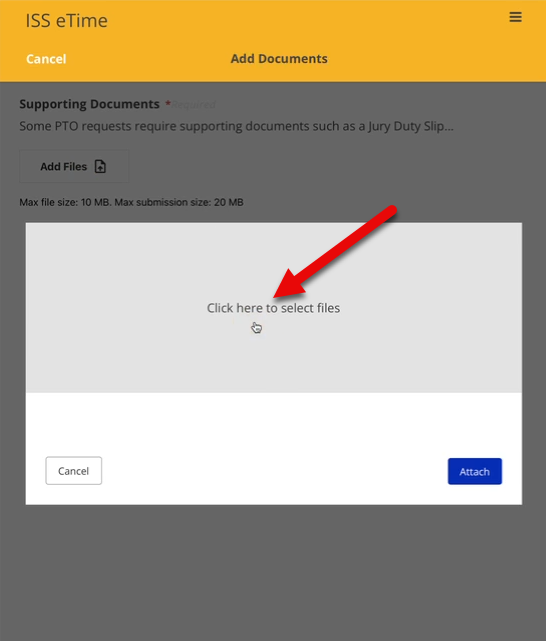
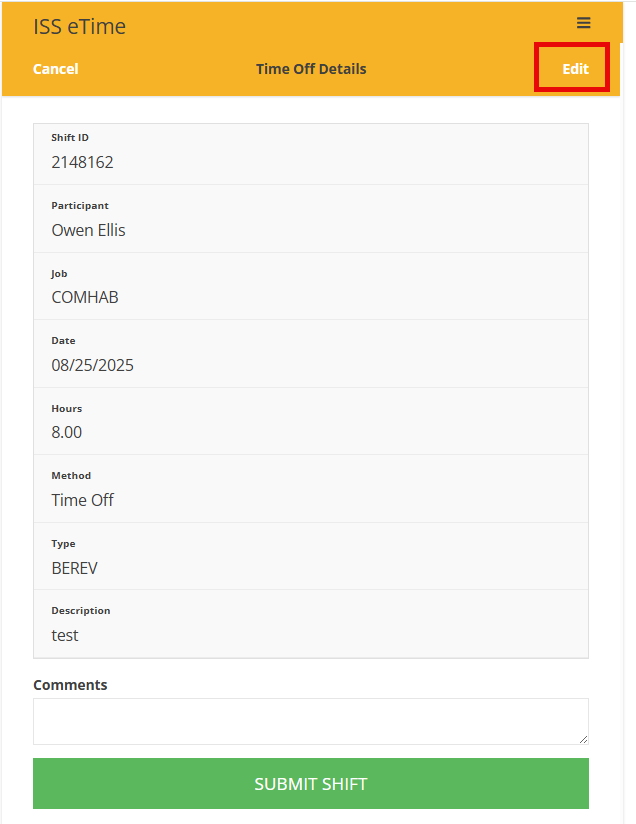
Choose the participant, the job, fill in a date, fill in the number of hours, select the type of time off, provide a description, and if necessary attach supporting documents.
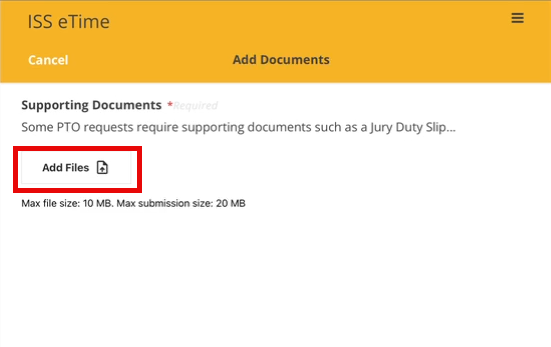
Documentation is required for JURY (Jury Duty) pay. When you are called for Jury Duty, at the end of your service, the court clerk will give you a proof of service which lists the dates that you served. Please upload that with your JURY time off submission.
Documentation is required for BEREV (bereavement) pay. This can be in several different forms. It can be a funeral card from attending the services, an obituary or published death notice, or an official death certificate. Please upload whatever documentation you have and put in the note what your relationship to the deceased was (brother, parent, etc).


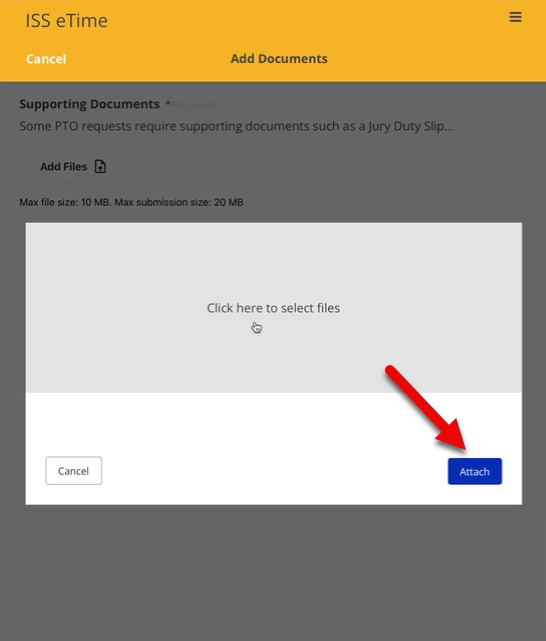
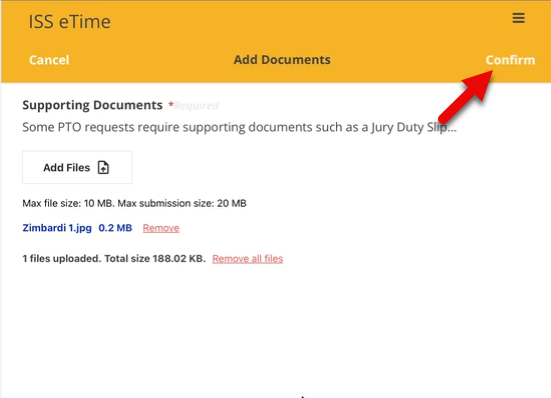
Once you have selected all the supporting documents, click "Attach" then "Confirm"

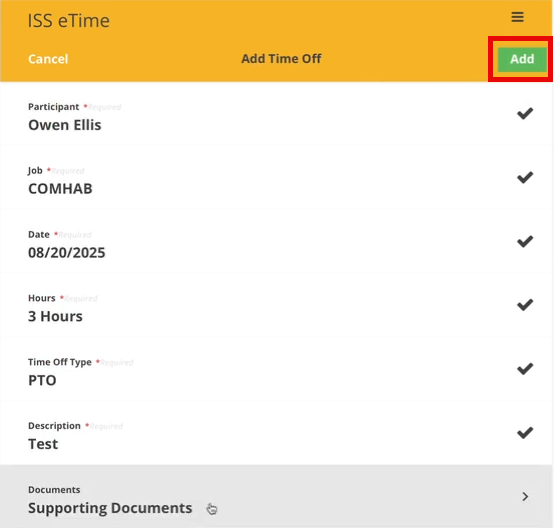
Once completed, click Add.

- If you need to edit the details of the time off request, click the Edit button in the top right, make the desired changes, and then click Update to save the changes. After the details have been verified, enter a comment if applicable and click Submit Shift.

-
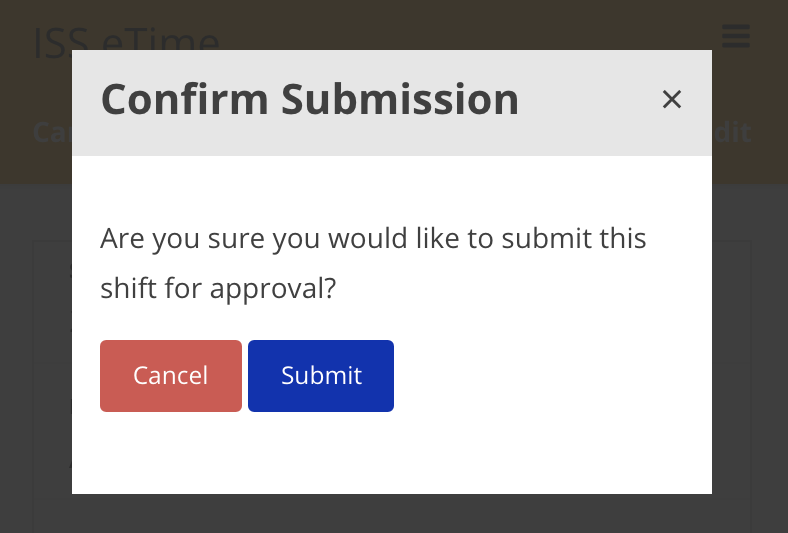
After clicking the Submit Shift button, a confirmation window pops up. Click Submit to finalize and send the shift for circle approval.
Disclaimer: All names displayed in the above screen shots are fictional characters. No identification with actual persons (living or dead) is intended or should be inferred.
Updated 08/21/2025.
Deleting a Shift
Only support staff can delete their own shifts. Only shifts marked as Draft and Returned to Staff can be deleted.
A support staff may need to delete a shift if they created the shift by accident. If you accidentally started an eTime Live shift, simply end the shift and then delete it.
To delete a shift:
- Navigate to eTime Live and click the trash can icon on the shift to be deleted.
- Click Yes, delete this shift on the shift deletion confirmation window that appears.
 .
. 
 .
. 
If you need to delete (or edit) a shift that is not marked as Draft or Returned to Staff, how you handle it depends on its status.
- Being Processed at ISS - contact Payroll immediately. Depending on the status of payroll processing, they will either be able to return the shift to you or they will need to process a payroll adjustment.
- Pending Circle Review - contact your circle approver immediately. They will need to return the shift to you.
Disclaimer: All names displayed in the above screen shots are fictional characters. No identification with actual persons (living or dead) is intended or should be inferred.
Updated 07/24/23.
Auto-Deleted eTime Shifts
eTime shifts with the following status that have not been modified in 30 days will be deleted.
- Draft
- Returned by Circle
- Returned by ISS
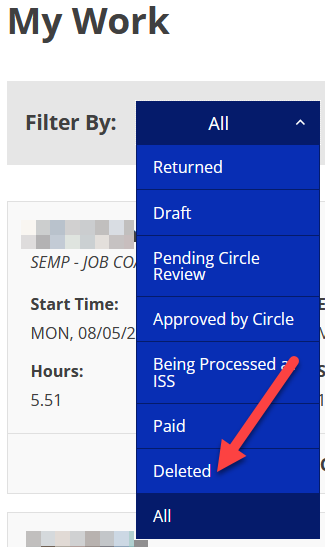
You can find these auto-deleted shifts by going to My Work and filtering to all Deleted shifts. All deleted shifts appear here, including the ones you deleted.
Remember, you cannot view more details on deleted shifts and you cannot modify them. If a shift was deleted that shouldn't have been, use the instructions to create a forgotten shift to re-create the shift.
Disclaimer: All names displayed in the above screen shots are fictional characters. No identification with actual persons (living or dead) is intended or should be inferred.
Created 08/06/24.
Method Options
In Person Face-to-Face
- Any service provided that directly involves the participant and support staff in which both are physically present. This is the most common method.
- Activities must be selected.
Virtual Face-to-Face
- Any service provided that directly involves the participant and support staff which occurs over the internet using a two-way audio-visual technology. Audio-only is NOT permitted.
- Should be used ONLY when the service can be effectuated through verbal prompting and cueing.
- Should NOT be used where a service or support requires the physical presence of a support staff for the health and safety of the participant.
- Requires additional information to be captured, including the technology used, location of both the participant and support staff, names of any additional support staff or circle of support members who attended, and if there were any technical issues.
- Activities must be selected.
Non Face-to-Face
- Any service provided or action taken on behalf of the participant, but without the participant's presence or involvement.
- Requires a description of the service provided.
- Activities must be selected.
Time Off
- Use this method for requesting/submitting all types of time off, then select the appropriate type of time off from the dropdown. Learn more about Requesting/Submitting Time Off.
Recording a Virtual Face to Face Shift
Certain jobs can be worked using the virtual method. Virtual Face to Face should be used ONLY when the service can be effectuated through verbal prompting and cueing.
Virtual Face to Face should not be used where a service or support requires the physical presence of a support staff for the health and safety of the participant.
Audio-only is not permitted, meaning that a virtual shift cannot be done via a normal phone call.
Examples of two-way audio-visual technology:
- Skype
- FaceTime
- Zoom
- Google Duo
To record a virtual shift:
- Log into eTime and click Start Shift
- Select the employer, the job, choose Virtual Face to Face as the method.
- Click Add in the top right corner
- Click the shift that was just created
- Fill in the required information for Virtual Face to Face shifts:
- Software Used
- Additional Attendees
- Staff Location
- Participant Location
- Technical Issues
*Note - Once the shift has ended, you will be able to fill these details on the Finalize Details screen*
- Once finished, click Update in the top right corner
Disclaimer: All names displayed in the above screen shots are fictional characters. No identification with actual persons (living or dead) is intended or should be inferred.
Data Validation
Overlaps
A support staff is not allowed to submit shifts that overlap one another. Prior to submitting a shift, the eTime mechanism will check for overlaps against all the support staff’s shifts, excluding those shifts with a status of Draft or Returned to Staff. A shift can be saved if overlaps exist, but it cannot be submitted.
Future Dates
Future dates are not allowed on shifts. eTime will not allow you to save or submit a shift with a future date. All time should be recorded at time of service on paper, and then transferred to eTime after the fact.
Activities
Activities must be selected for most all shifts, regardless of job or method. The only exceptions to this are Time off and Respite shifts. Activities do not need to be selected for Respite shifts since the activity, by definition, is always the same.
Special Cases
Respite
Respite shifts do not require the selection of Activities.
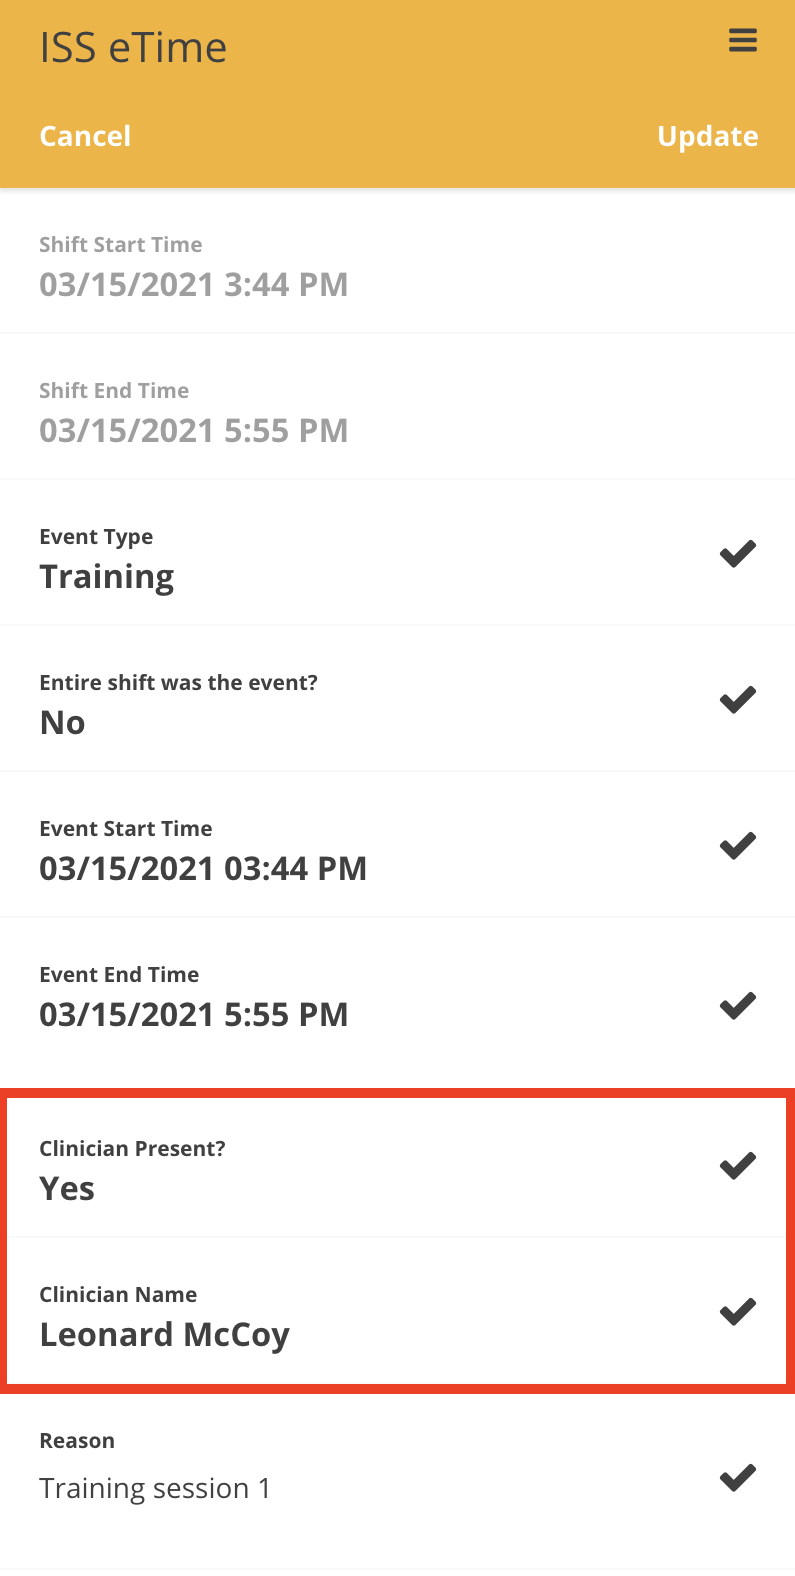
Recording Non Direct Clinician Services
- By default, this is set to No.
- If the clinician was present, select Yes and then provide the name of the clinician.

Disclaimer: All names displayed in the above screen shots are fictional characters. No identification with actual persons (living or dead) is intended or should be inferred.
Staff-Side Overlaps
A staff-side overlap occurs when a support staff's shift overlaps with one or more other shifts that he/she has previously submitted. An overlapping shift must be resolved before it can be submitted.
Overlap testing is only run against shifts that have already been submitted. In other words, if two shifts in Draft overlap each other, the overlap will not be flagged. However, as soon as one of the shifts is submitted, an overlap will be flagged on the remaining shift.
When resolving the overlap, only the Draft shift can edited. Previously submitted shifts cannot be edited.
Updated 2/13/2024
Circle-Side Overlaps
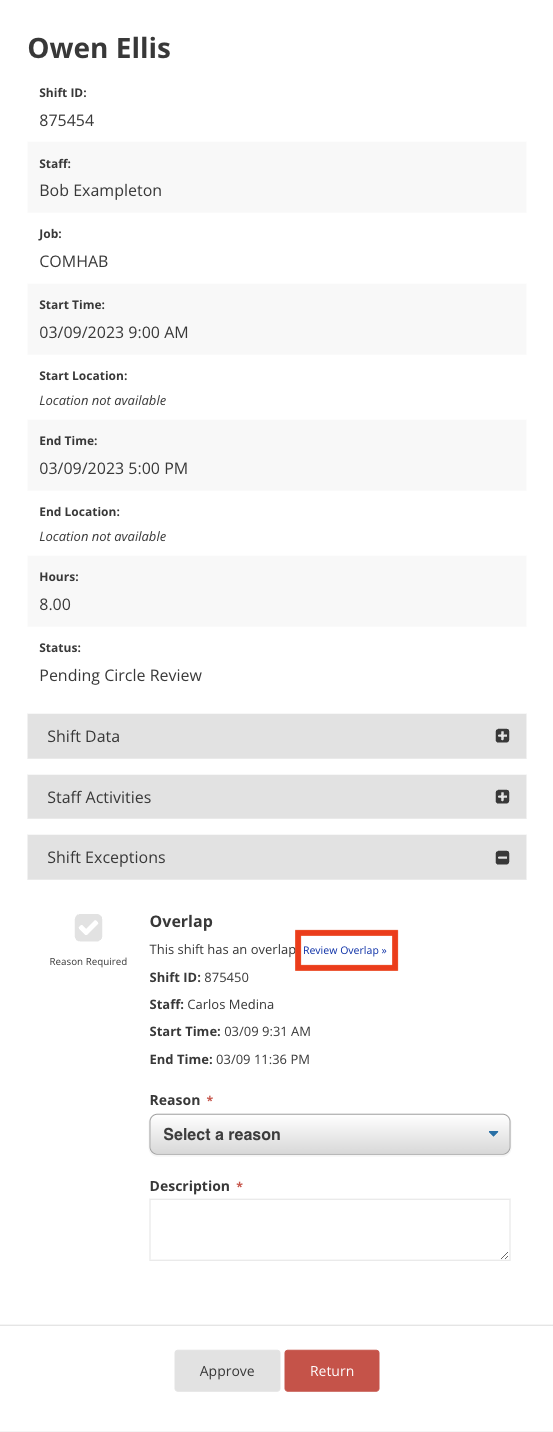
While reviewing a shift, a staff's time may overlap with time submitted by another staff. An overlap occurs when two or more support staff submit overlapping time for the same participant. Common reasons for this include trainings and circle of support meetings. In this case, the shift will have an indicator that overlaps exist.
Overlaps must be resolved in order to approve a shift. As shown below, when an overlap is valid, resolving it can be as simple as reviewing and approving it.
Review an Overlap
Click Review Overlap to view a summary of the overlapping shifts. Review the shifts and decide whether to approve the overlap or not.
 Approve an Overlap
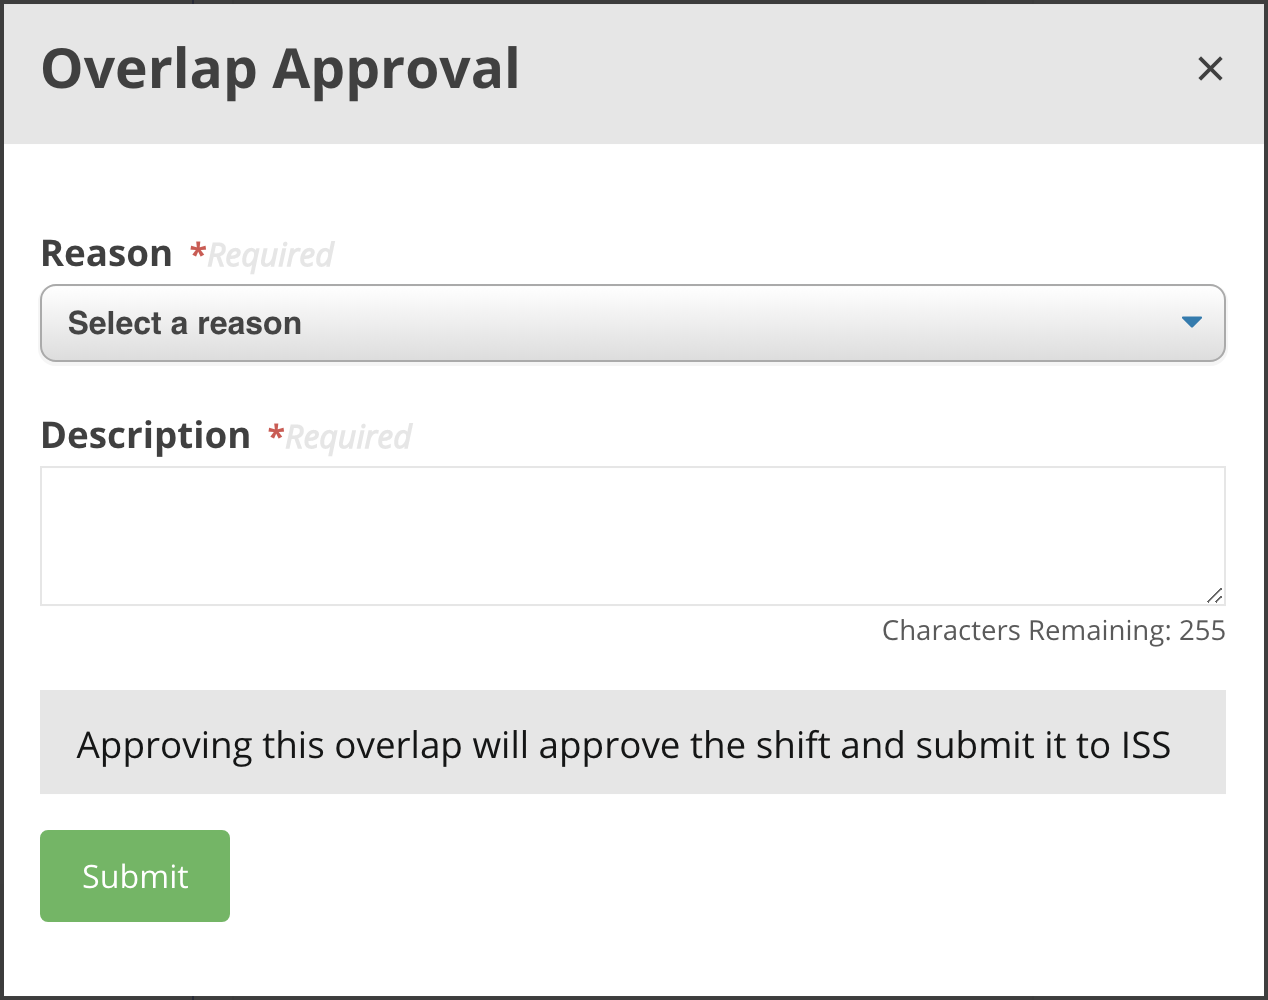
To approve the overlap, click the Approve checkbox, select a reason and provide a description for the overlap at the bottom of the window. Once filled in, the larger Approve button below will turn green. Click the green Approve button to approve the shift which will submit the shift to ISS.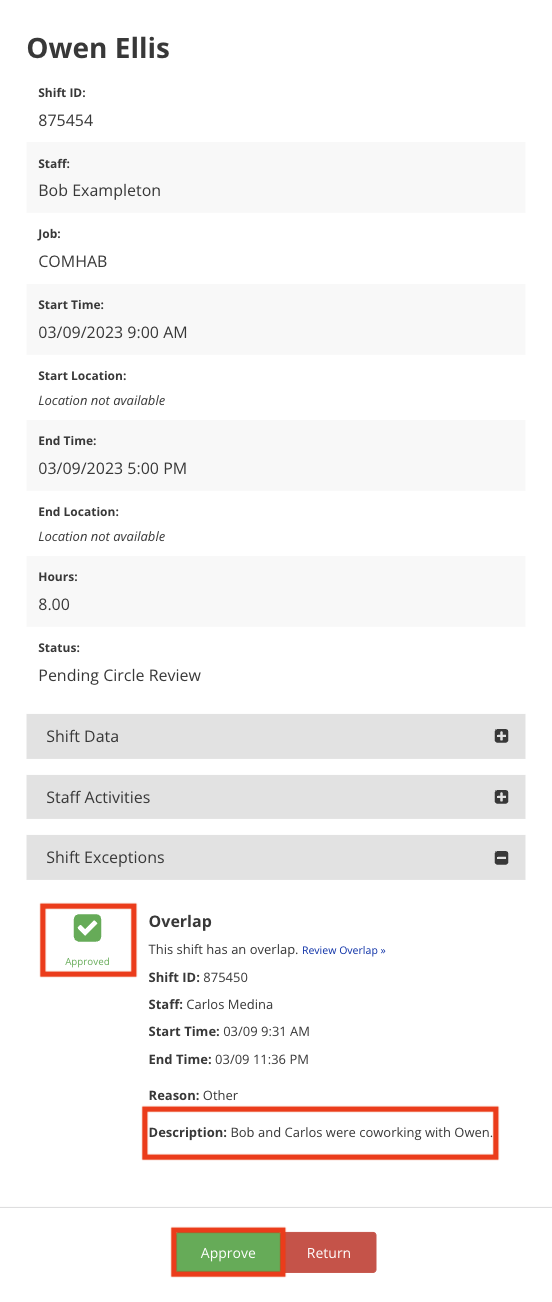
After approving an overlapping shift and submitting it to ISS, the shift will still display that an overlap exists and that it was approved.
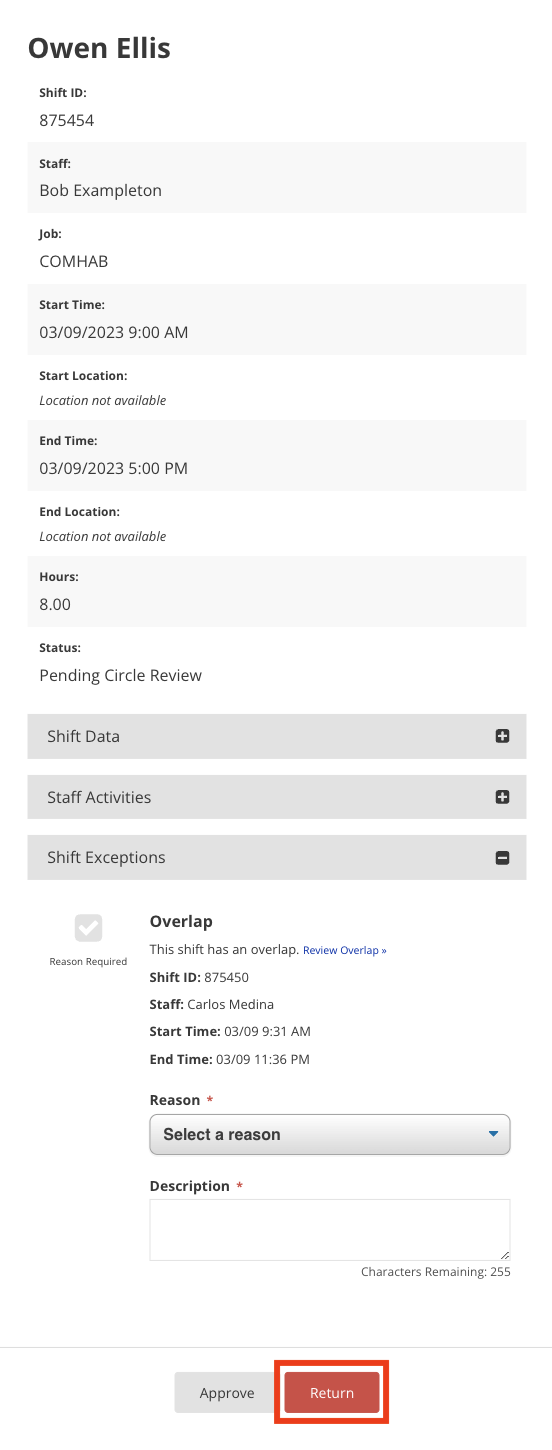
Return an Overlap
To reject an overlap, click Return, select a reason and provide a description for returning the overlap. Note that clicking Return will send the shift back to the support staff in order for them to make corrections.
Disclaimer: All names displayed in the above screen shots are fictional characters. No identification with actual persons (living or dead) is intended or should be inferred.
Updated 07/24/23.
Tips for Preventing and Solving Common Issues
1. Missing an entire shift
2. Training shifts
3. Location Issues
Location not working
Location inaccurately puts you outside Participant’s Home by X meters
4. What to do if you made an error
5. Starting a shift - incomplete
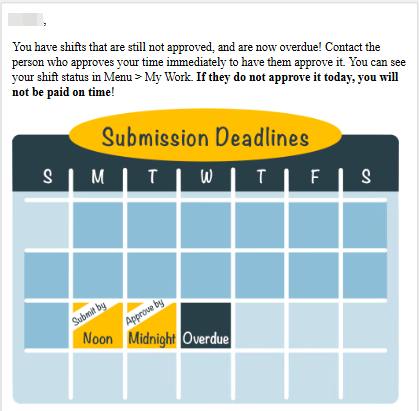
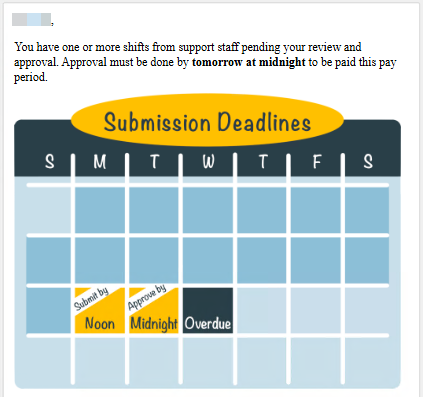
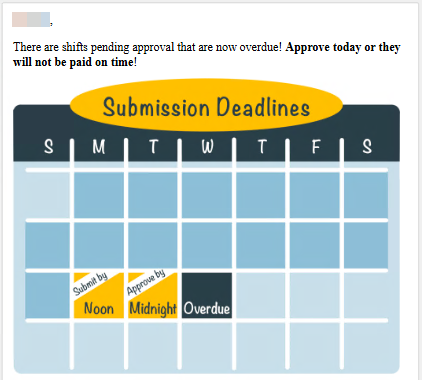
Shift Approval Reminder Emails
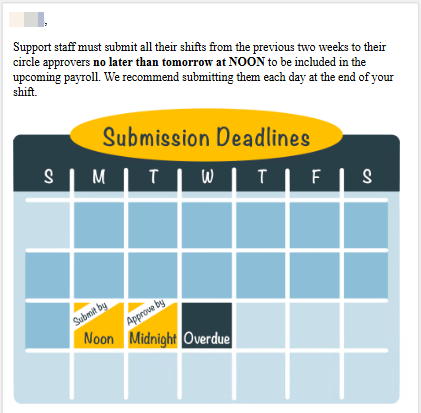
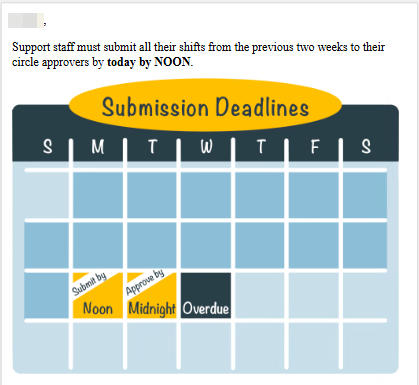
Reminders about eTime shifts requiring attention are sent to both staff and approvers as the payroll approval deadlines approach or pass.
Emails are sent regardless of the date of the shift or the pay period in which it would be paid. If a shift exists that hasn't yet been approved and sent to ISS for processing, an email will be sent to both the staff and the approver.
Staff Email Examples
Shifts Due Monday at NOON
Shifts Due Today at NOON
SHIFT APPROVALS OVERDUE!
Approver Email Examples
Shifts Pending Approval – Due TUESDAY
Shifts Pending Approval – Due Today

SHIFT APPROVALS OVERDUE!
Created 06/25/25.
Glossary of Terms
Shift
A block of time defined by a start and stop time; this is analogous to the previous concept of a line on a timesheet.
Job Period
A dynamic collection of all shifts falling within a specific date range (pay period) that all belong to the same participant, support staff, and job.
- A support staff will have a different job period per job per participant.
- Likewise, a participant will have a different job period per job per staff person.
eTime Ready
Refers to participants and jobs. eTime Ready participants have one or more jobs that are eTime Ready. A job is eTime Ready when the associated Staff Action Plan and Blank Timesheet is completed (“Blank Timesheet” here refers to the list of activities made available for a job). See also Am I eTime Ready?.
EVV Required
Refers to and describes a shift. Per Medicaid regulations, the combination of the job and the method selected for a shift determine whether it is EVV Required.
EVV Required Job & Method Combinations:
- ComHab - Face to Face
- ComHab - Virtual Face to Face
- Respite - Face to Face
EVV Valid
Refers to and describes the start or end of a shift. It means that a valid geocode was captured for the action (i.e. starting a shift or ending a shift).
EVV Invalid
Refers to and describes the start or end of a shift. It means that a valid geocode was NOT captured for the action (i.e. starting a shift or ending a shift).
EVV Verified
Refers to and describes an entire shift. A shift is EVV Verified if the start and end are both EVV Valid.
EVV Unverified
Refers to and describes an entire shift. A shift is EVV Unverified if either the start or end is EVV Invalid.
Timesheet
A timesheet refers specifically to the artifact that ISS Payroll uses to process support staff time. It does NOT refer to the time submitted by support staff. Any number of shifts for the same support staff, participant, and job may be combined into a single timesheet, irrespective of how those shifts were submitted to ISS. Timesheets are also the artifact that is charged against a participant's budget.
Check
A check refers to the specific artifact on which ISS paid a shift or expense. Payment may have been received via physical check or direct deposit, but in both cases, there is a check and check number associated with the transaction.
Web Approver / Circle Approver
The primary job of the web approver in the circle of support ("circle approver") is to act as the supervisor of the participant's support staff; specifically, to review and then either approve or reject the time submitted by staff.
In addition to approving time, a circle approver can also:
- Submit Monthly Summary Notes on behalf of the participant
- Sign the Staff Action Plan on behalf of the participant
Glossary of eTime Icons
Source Icons:
 |
Indicates the shift was recorded using eTime Live. |
 |
Indicates the shift was recorded using eTime Entry, which is now only used for Time Off. |
Method Icons:
 |
Indicates the shift is Face to Face. |
 |
Indicates the shift is Virtual Face to Face. |
 |
Indicates the shift is Non-Face to Face. |
 |
Indicates the shift is Time Off. |
Location Icons:
 |
Indicates a start/end location of home. |
 |
Indicates a start/end location of community. |
 |
Indicates a start/end location outside the geofence, but overridden to home. |
EVV Shift Status Icons:
 |
Indicates the shift is EVV Verified. |
 |
Indicates the shift is EVV Unverified. |
 |
Indicates the shift is EVV Valid - Override, meaning the start and/or end time and/or location was overridden. |