Adding an Expense in eTime - Support Staff
Adding an Expense is simple. The most important thing is to make sure that you provide the correct documentation. The steps for this process are below:
1. Log into the Portal and open eTime

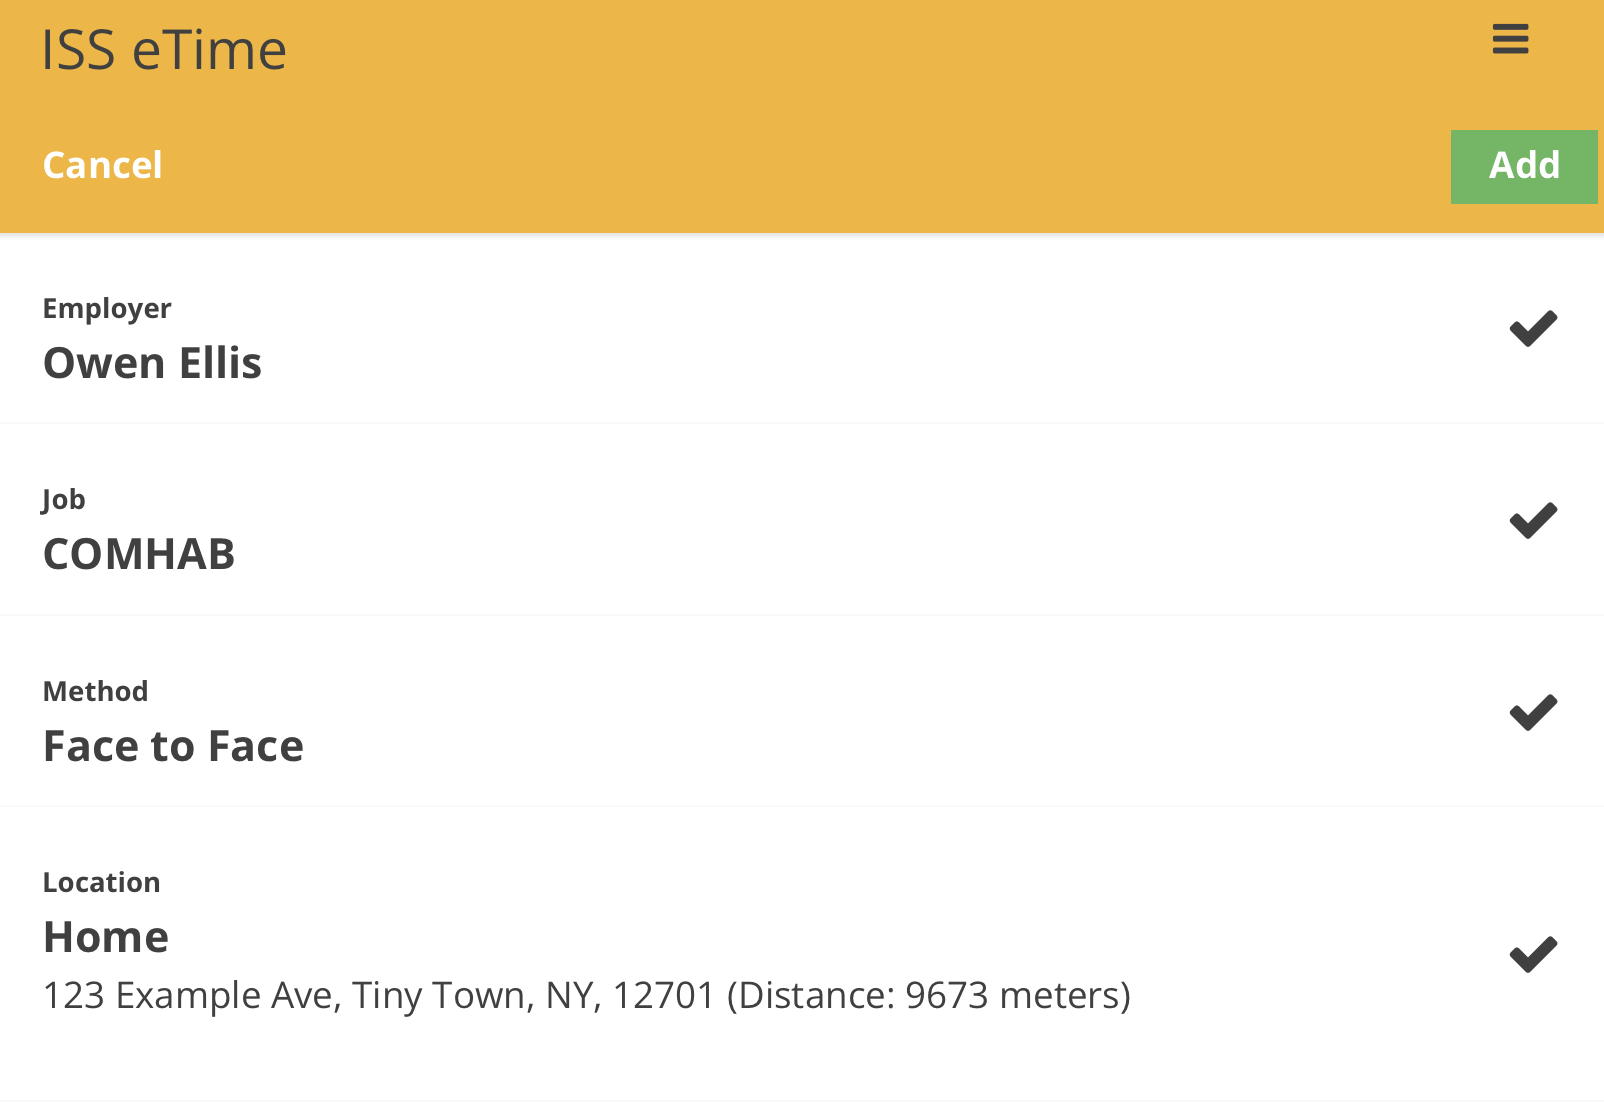
2. Start a shift

3. Input your information
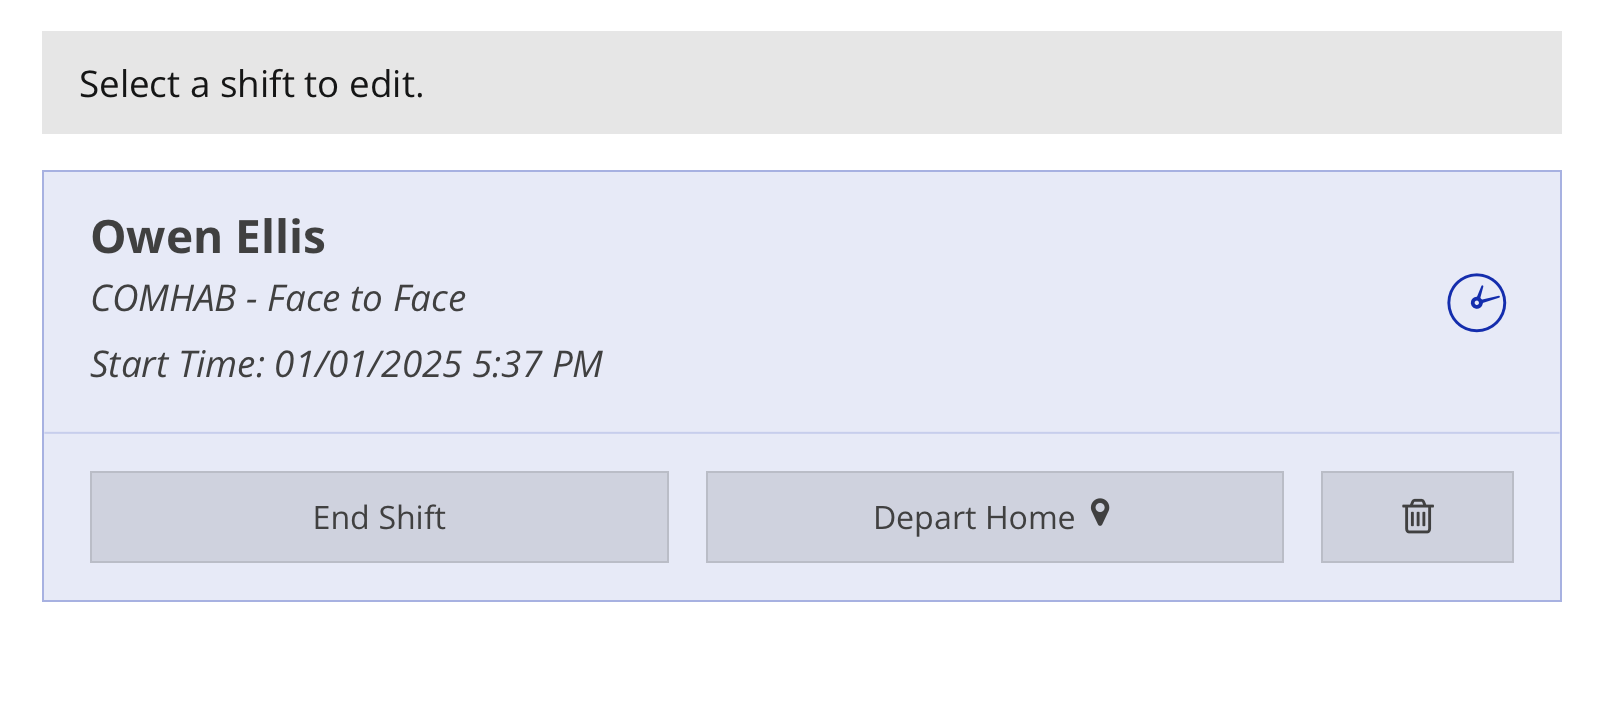
4. Select your shift
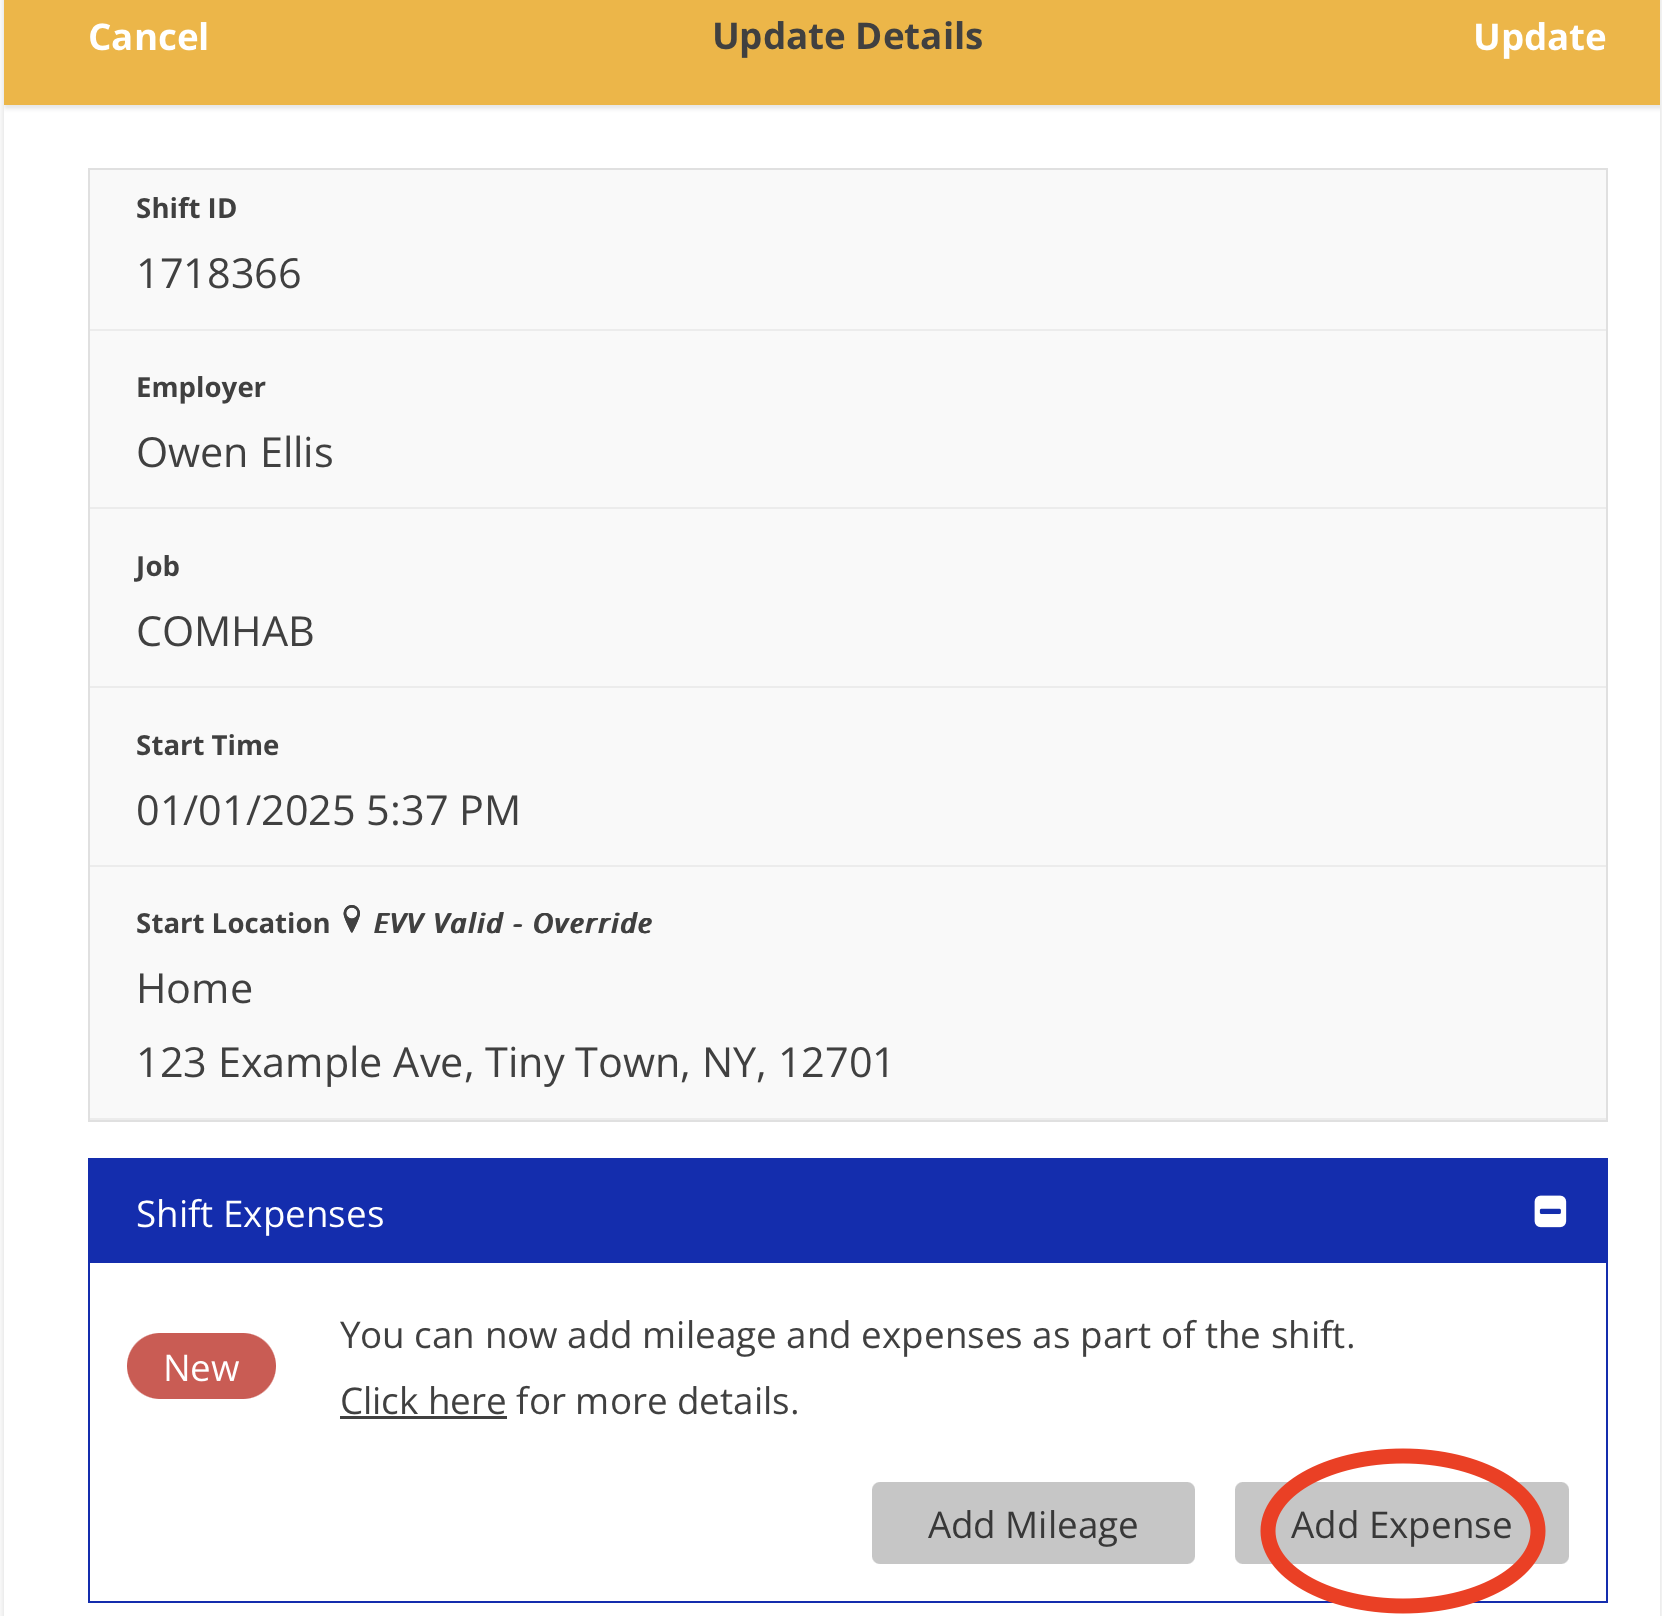
5. Tap the 'Add Expense' button
6. Pick your Expense Activity and tap the 'Next' button

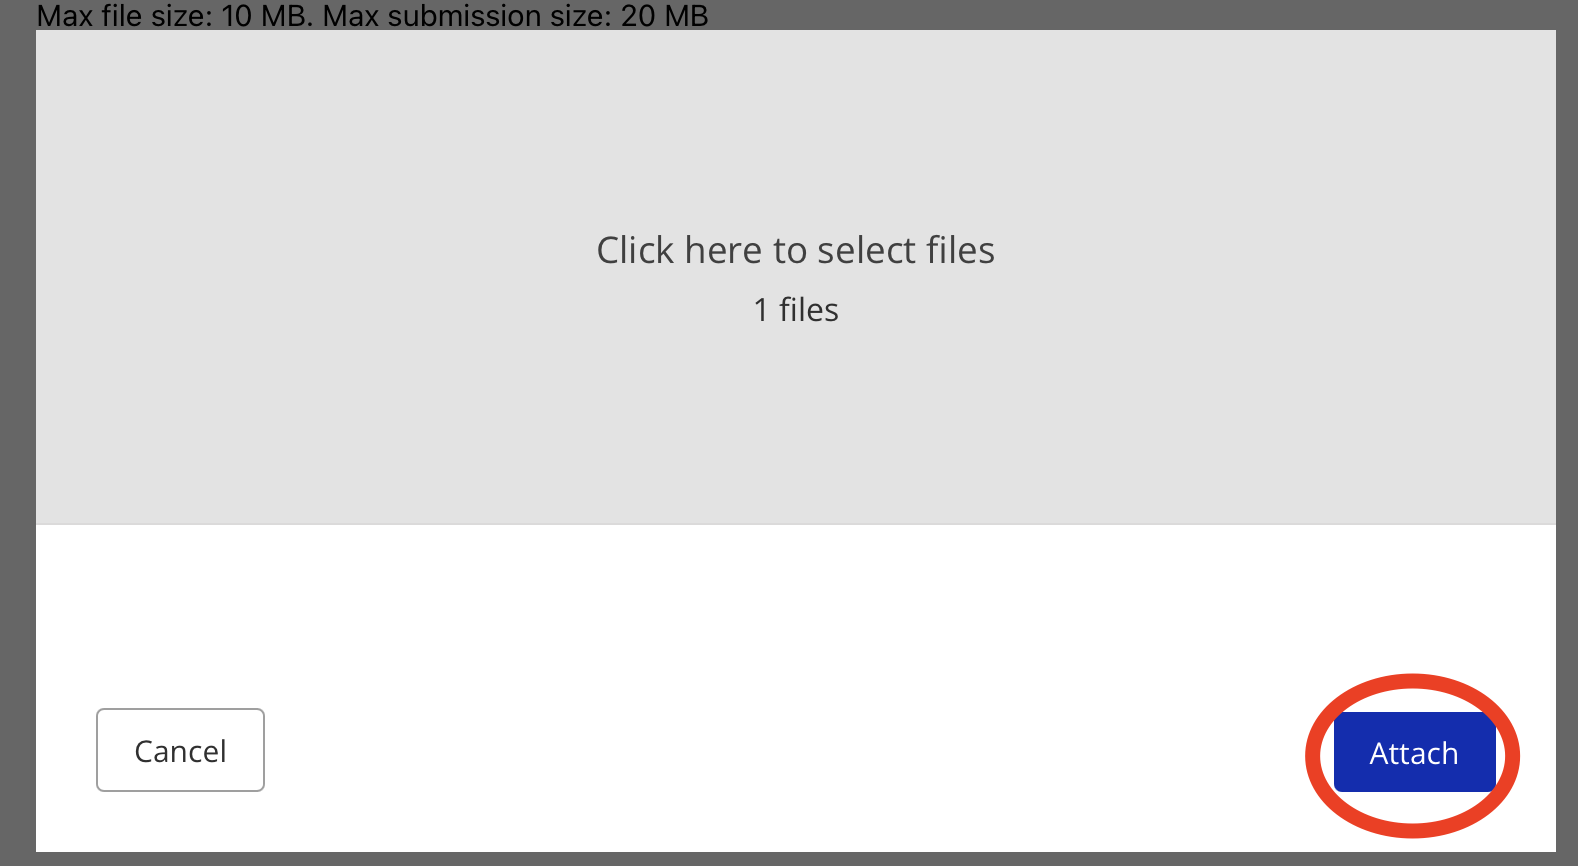
7. Tap the 'Add Files' button
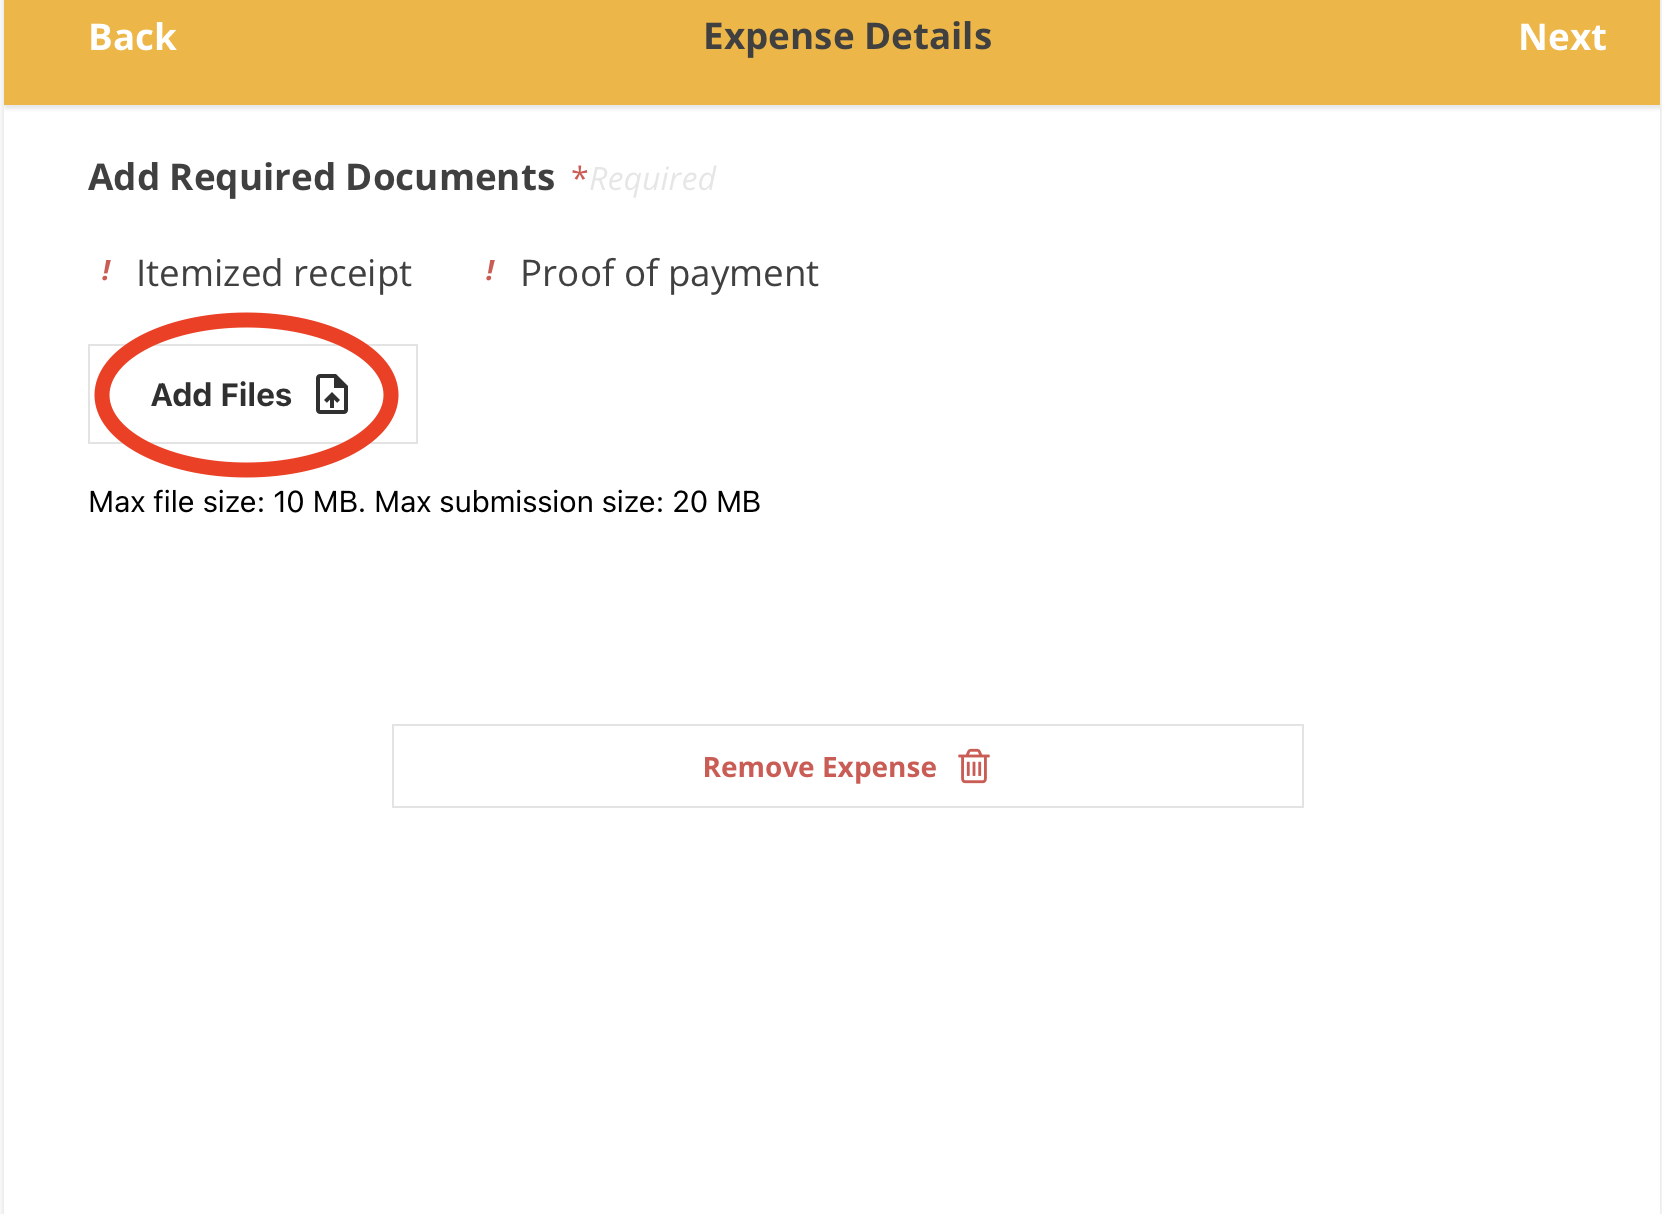
8. Tap the 'Attach' button
9. After uploading, select whether the item represents an Itemized Receipt, Proof of Payment, or both.
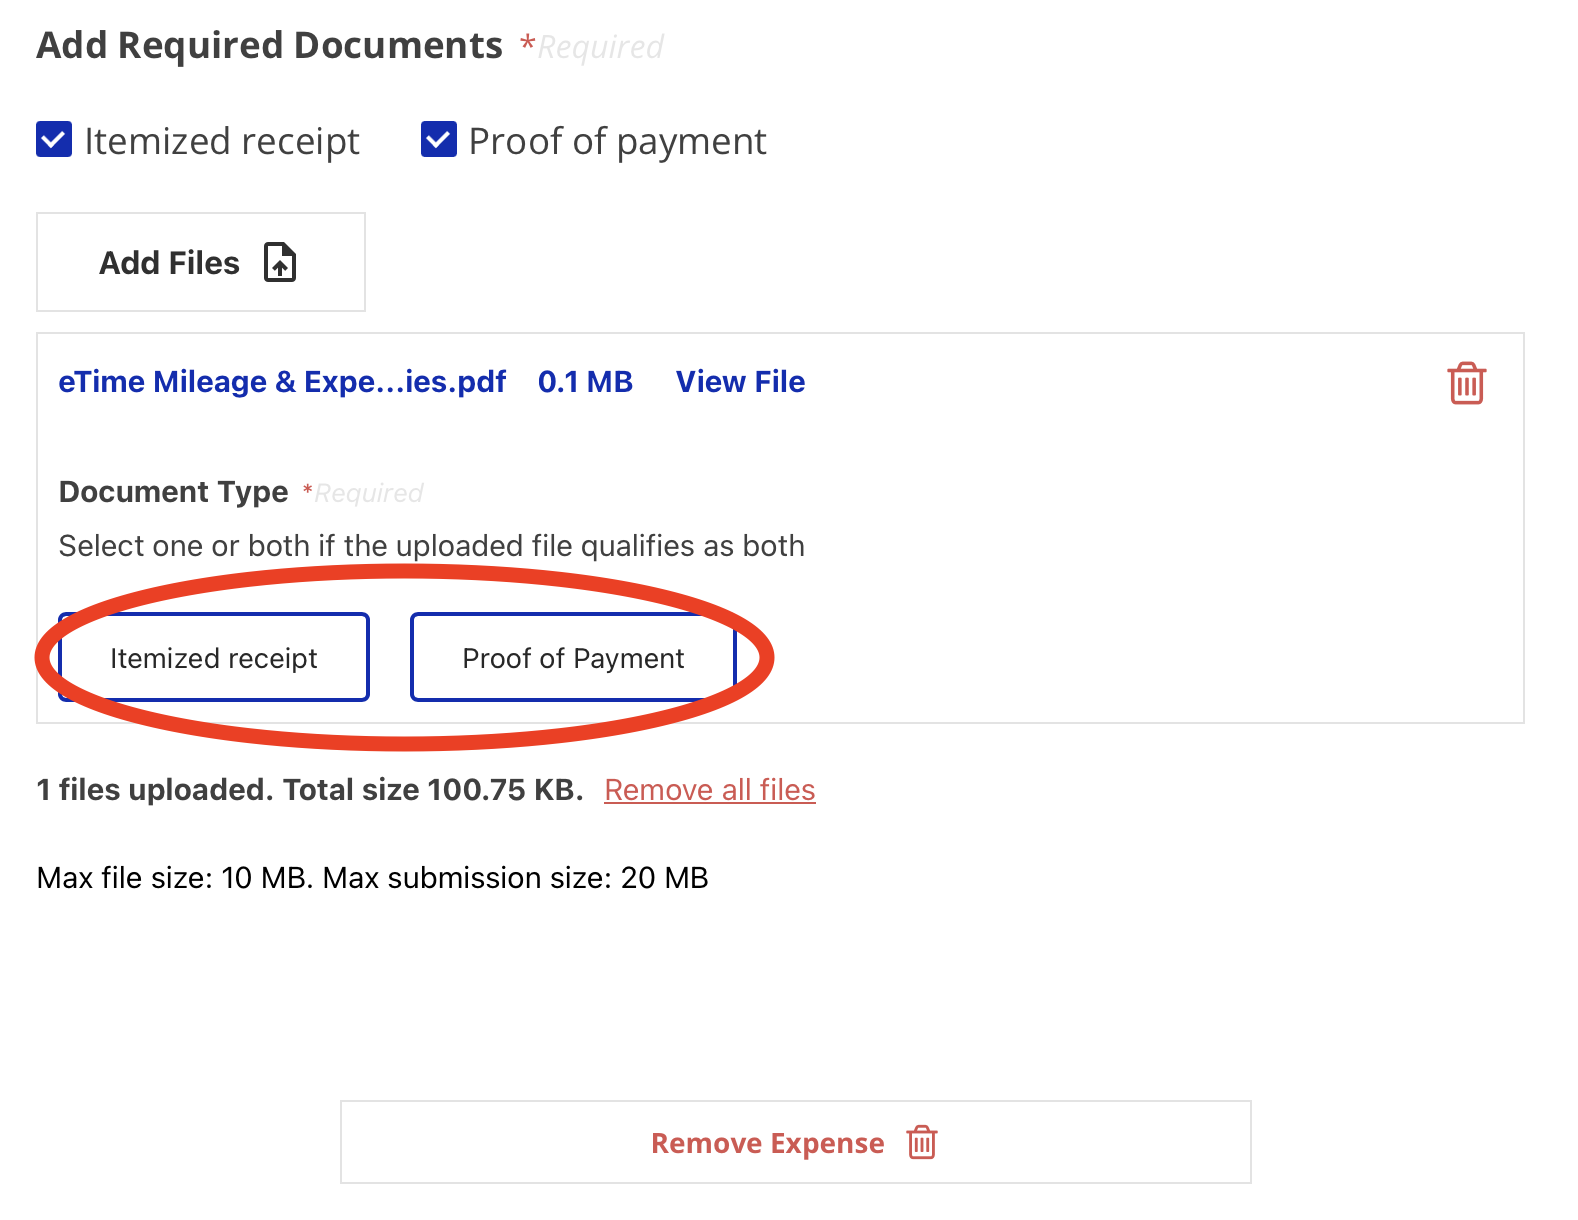
Further information on itemized receipts and proof of payment can be found on Staff Activity Fee Itemized Receipts and Proof of Payment.
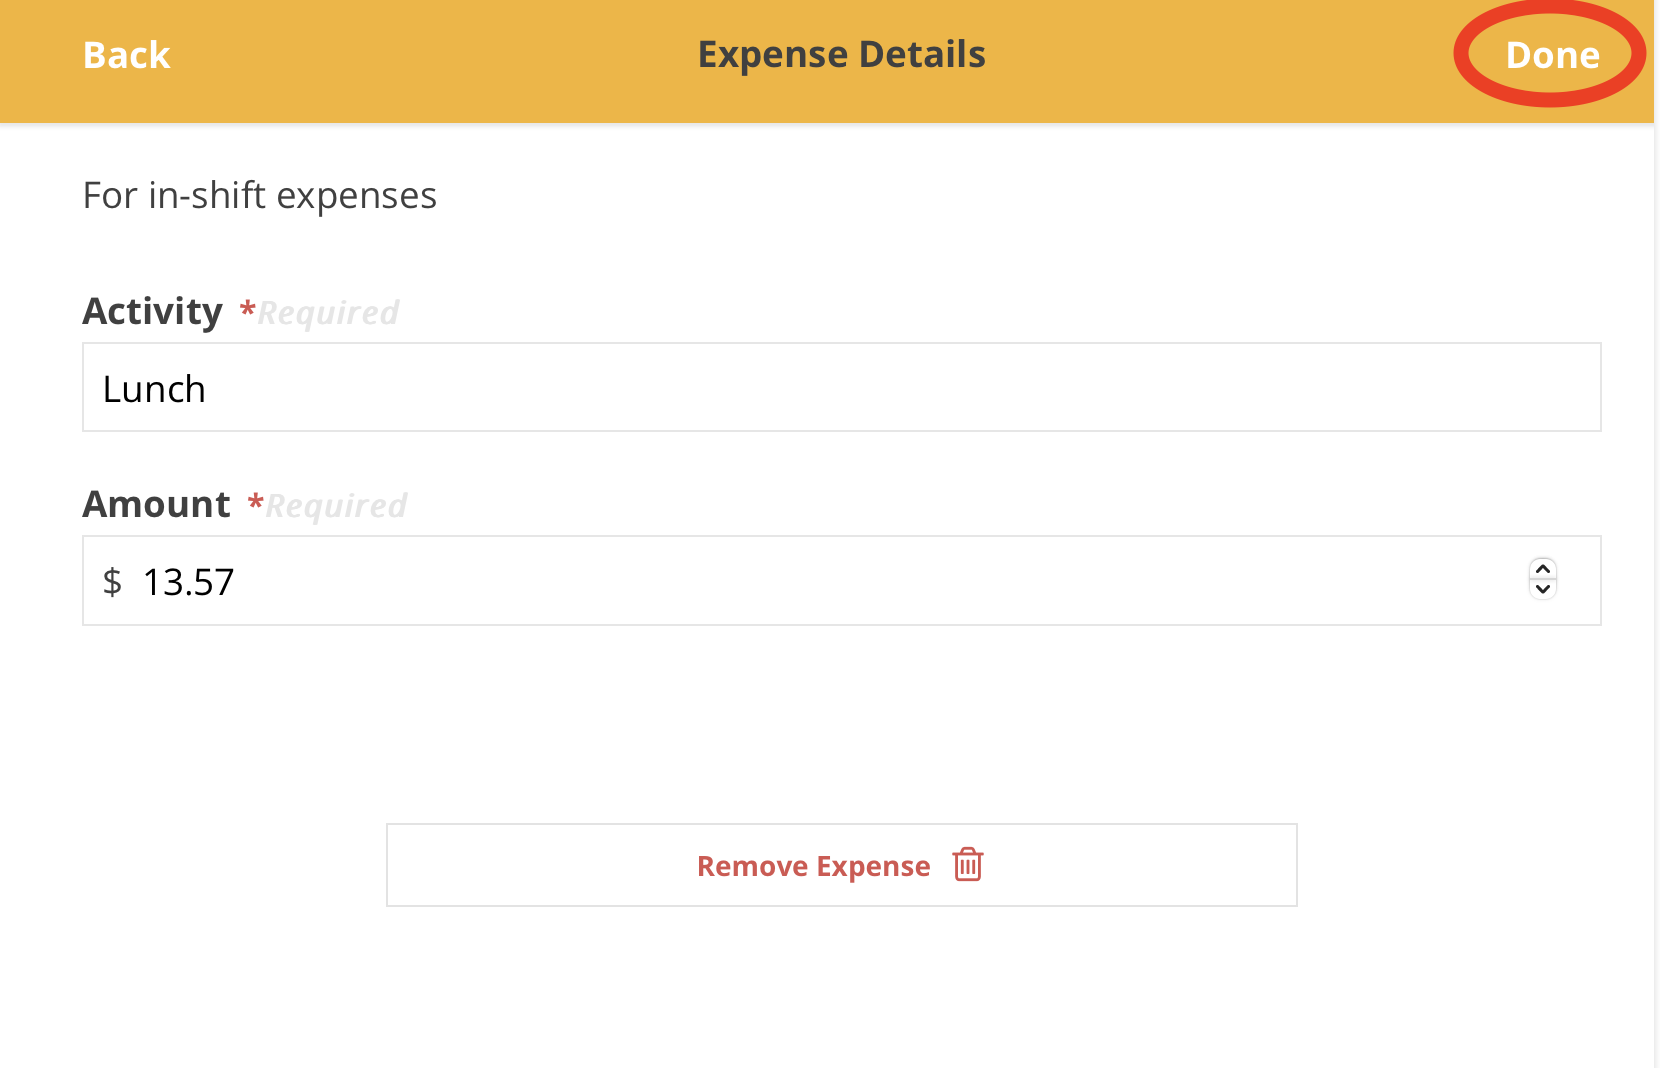
10. Input your Expense Details and tap the 'Done' button
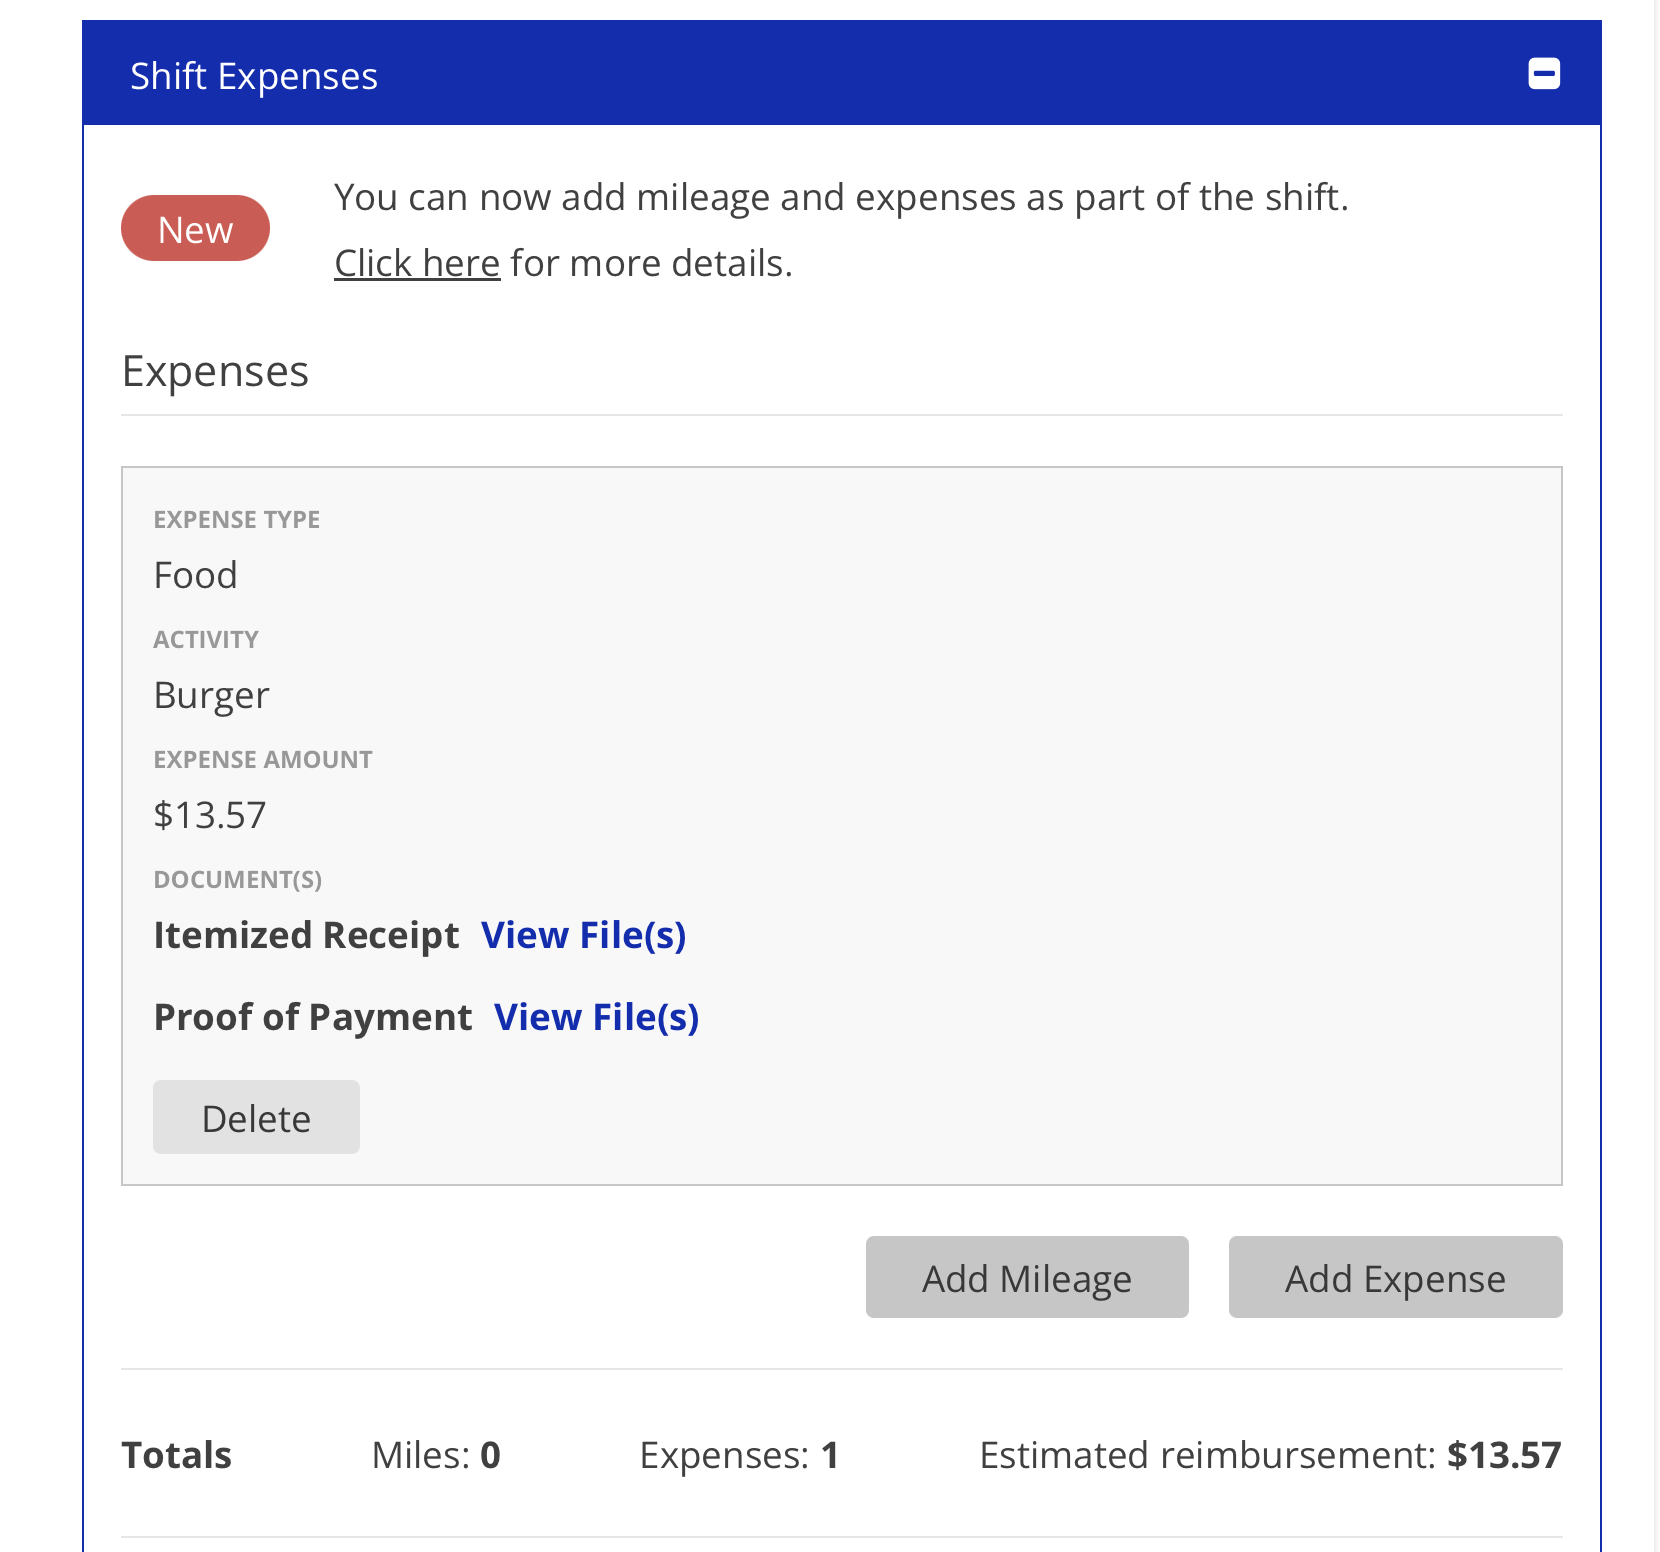
11. The finished Expense can be viewed and deleted within the shift
For further questions, please view our FAQ document:
Updated 01/07/25.